OVER $50 FREE SHIPPING WORLD WIDELY SHIPPING

How to Make a Flower Bead Bracelet (Step-by-Step Tutorial)
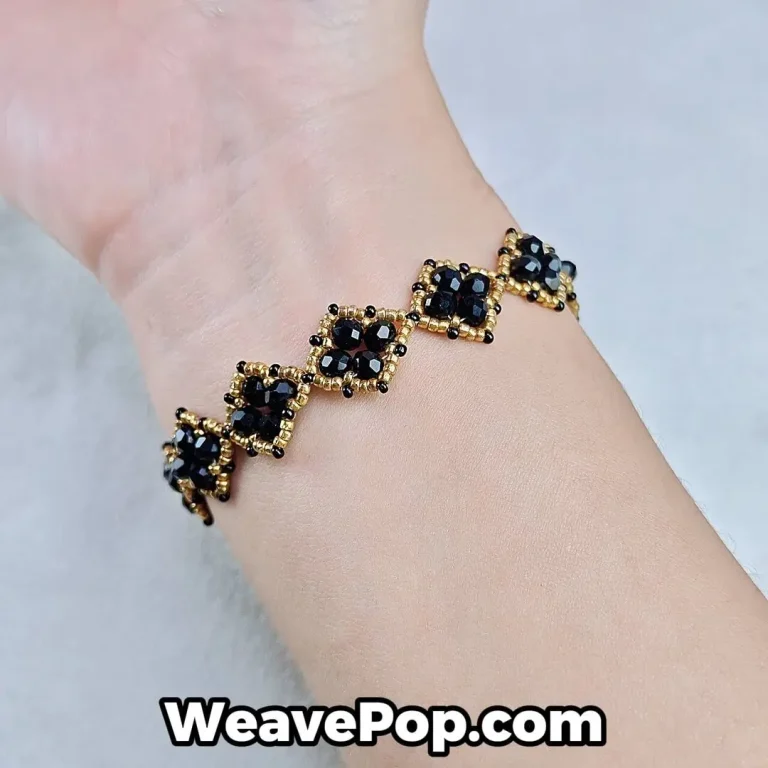
Want to learn how to make a beautiful flower bead bracelet that looks elegant but is surprisingly easy to create?
In this step-by-step flower bead bracelet tutorial, you’ll learn how to use seed beads and simple techniques to create a delicate clover-inspired design. This beginner-friendly project is perfect for anyone who loves handmade jewelry.
Materials Needed
To make this flower bead bracelet, you’ll need the following materials:
1.5mm seed beads (gold and black color)
4mm beads (black)
Beading thread or fishing line
Beading needle
Scissors
💡 Don’t want to spend time choosing the right beads?
Flower Bead Bracelet Tutorial (Step-by-Step)
Before you start, cut approximately 200 cm of beading thread and thread a size 11 PONY sewing needle.
Follow the step-by-step instructions below to create your flower bead bracelet:
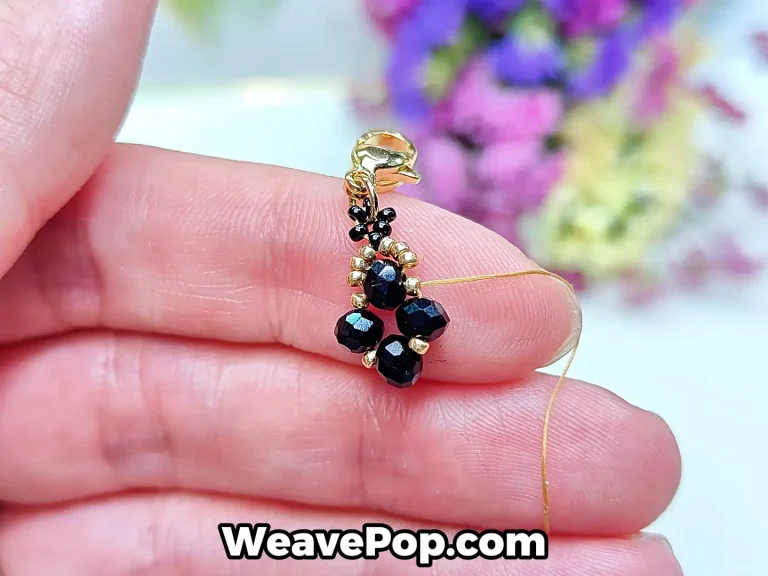
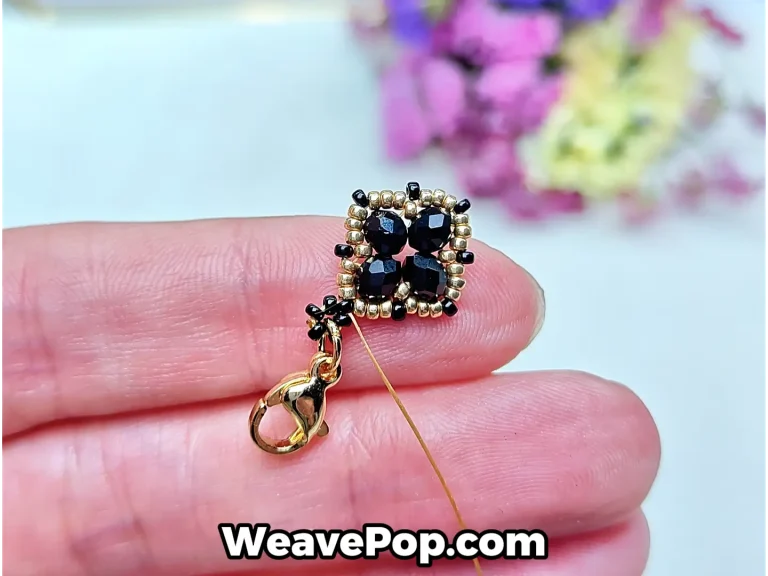
Step 1: Start the Bracelet Base and Attach the Clasp
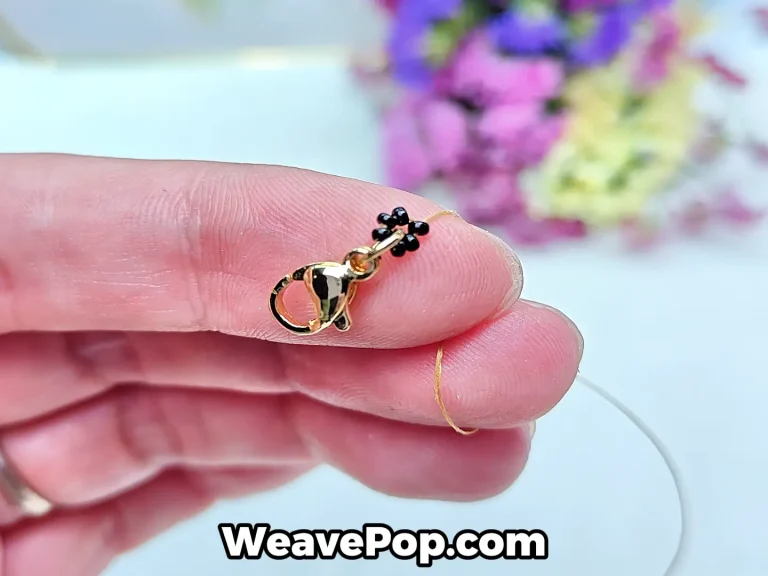
Add 3pcs black seed beads + clasp + 3pcs black seed beads. Slide them down to the end of the thread, then pass the needle back through all the beads to secure them and tie a knot.
Step 2: Add Gold Seed Beads and Flat Bead to Form the First Unit
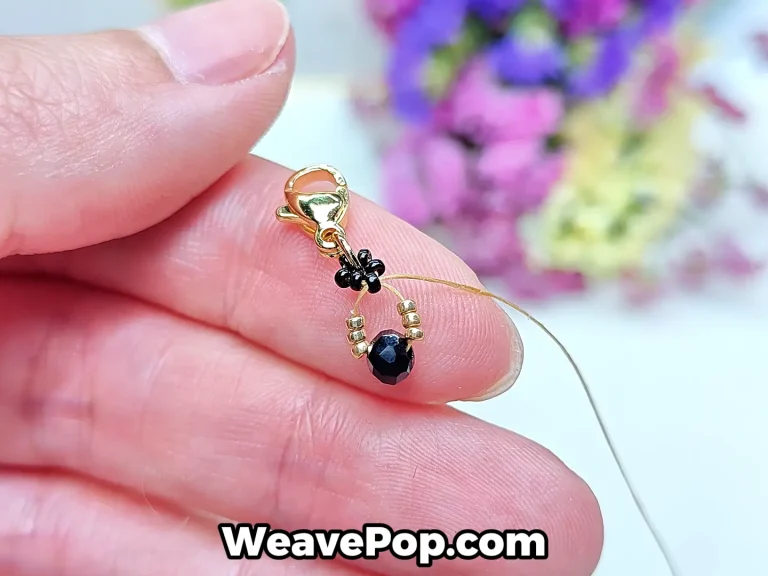
Add 3pcs gold seed beads + 1 flat bead + 3pcs gold seed beads. Pass the needle back through one black bead.
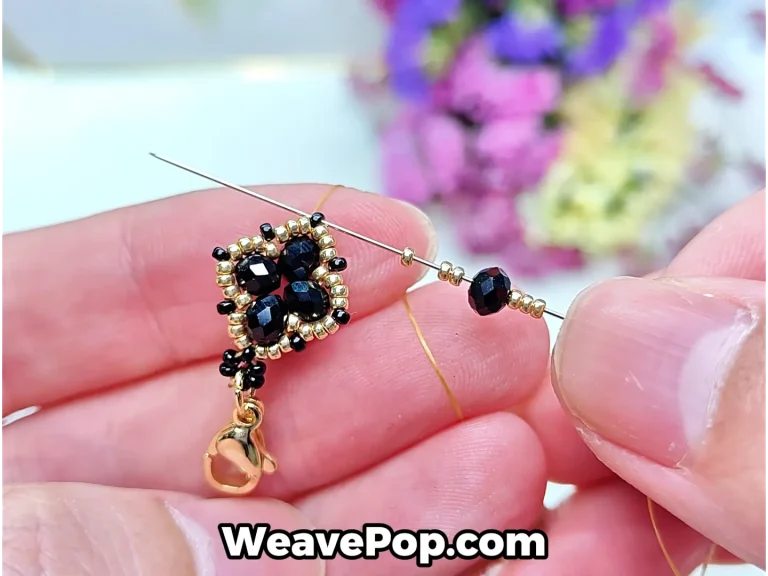
Step 3: Pass Through the Beads and Pull Tight to Secure the Structure
Pass the thread through 3pcs gold seed beads + 1 flat bead, then pull tight.
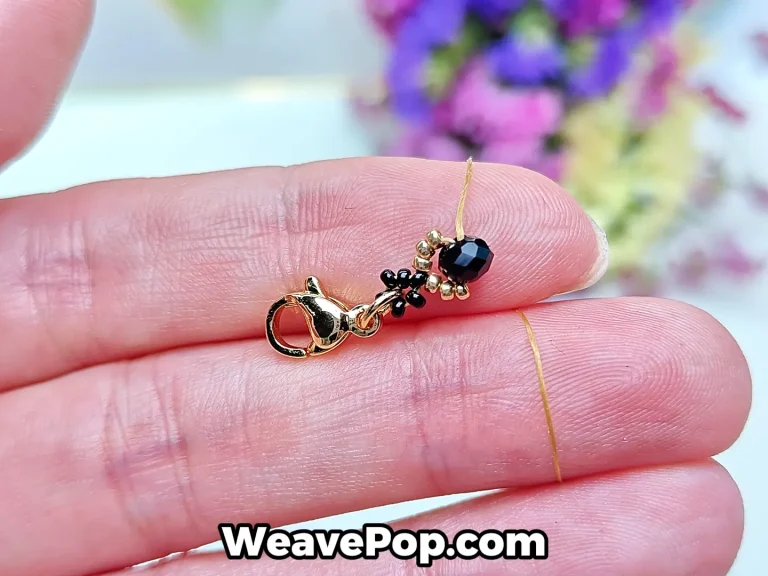
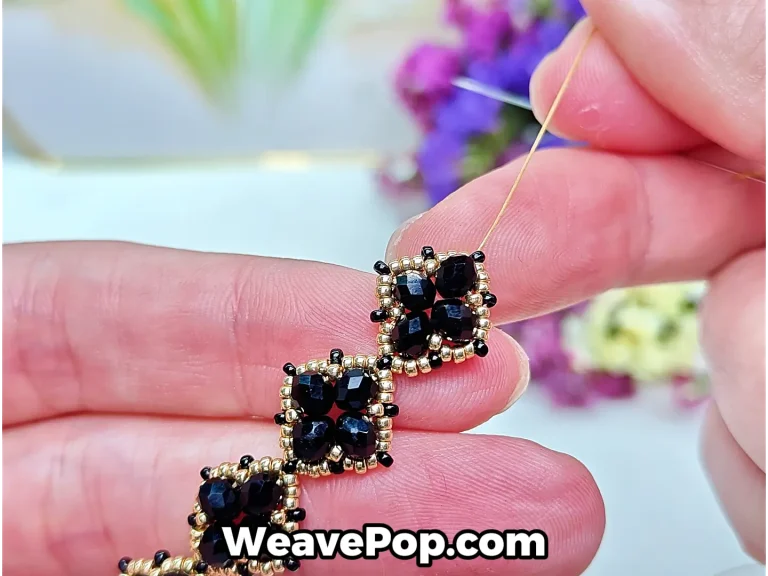
Step 4: Build the Flower Bracelet Edge Pattern
Add 1 gold seed bead + 1 flat bead + 1 gold seed bead + 1 flat bead + 1 gold seed bead + 1 flat bead + 1 gold seed bead. Pass the needle back through the flat bead, then pull tight.
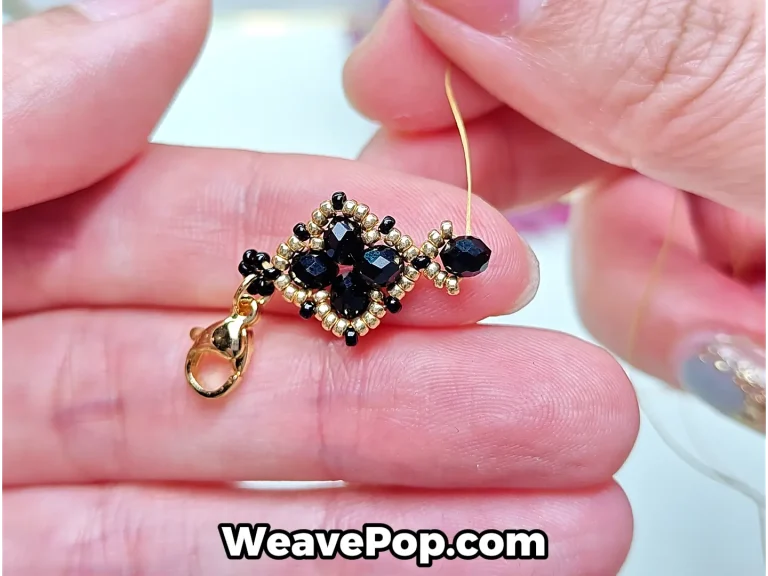
Step 5: Pass Forward Through a Gold Bead to Continue the Pattern
Pass the thread forward through one gold bead.
Step 6: Add Gold Seed Beads and Connect to the Next Bead

Add 6pcs gold seed beads, then pass the needle through the next gold bead.
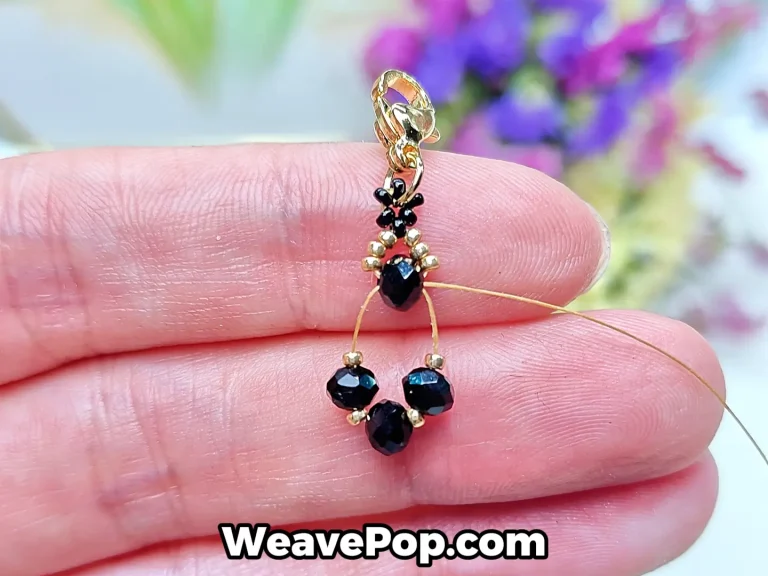
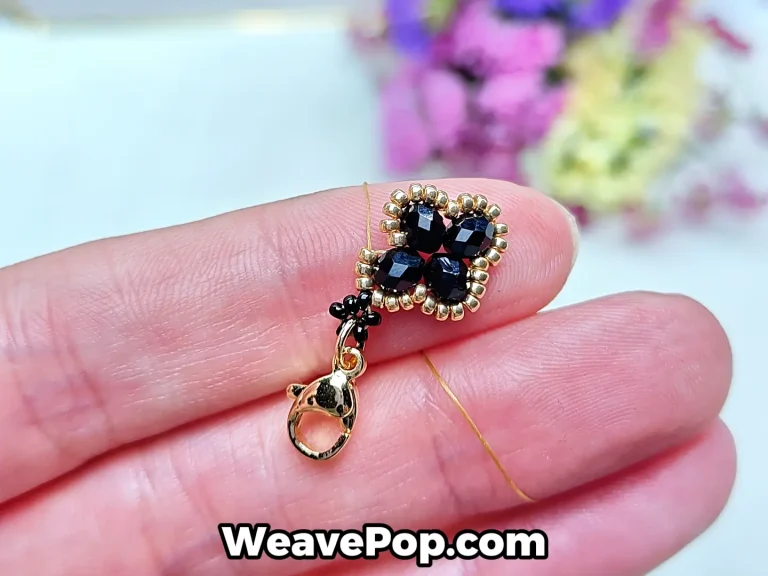
Step 7: Repeat the Flower Bead Bracelet Pattern
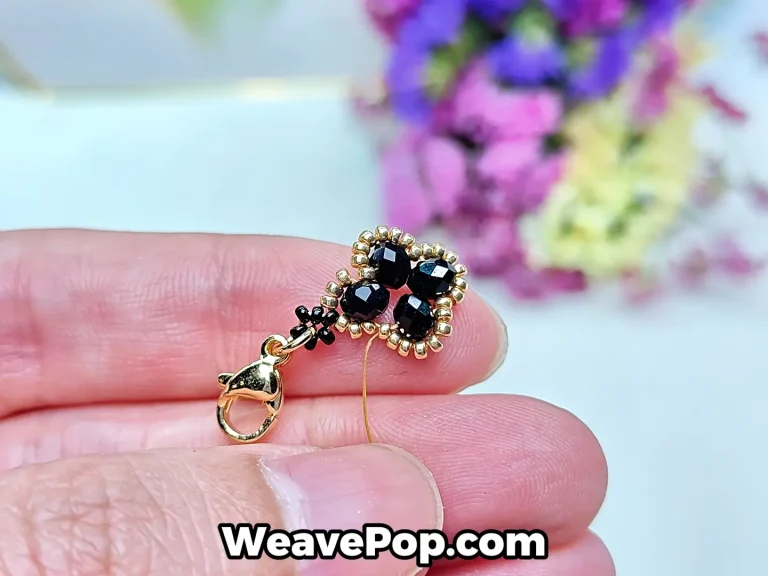
Repeat the same steps to complete the other two sets, forming the flower edge, as shown.
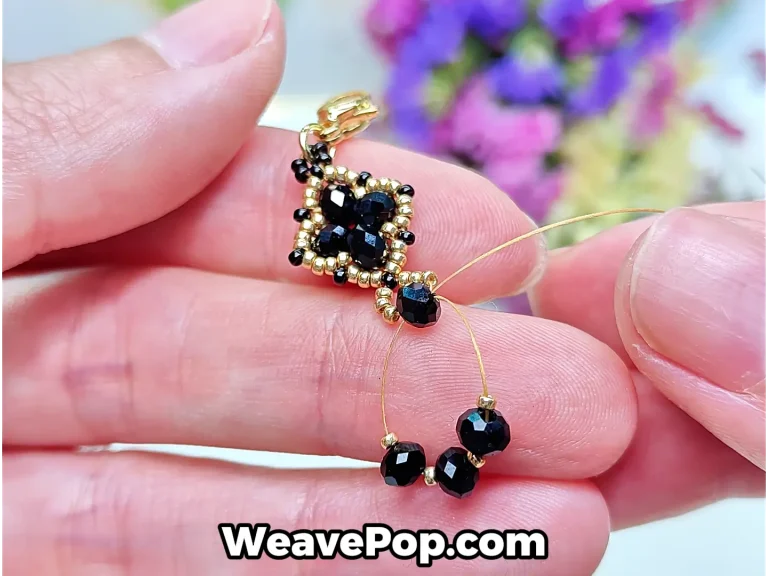
Step 8: Pass Through Gold Beads While Skipping the Center Bead
Pass the thread through 6pcs gold seed beads (⚠️ skip the middle black bead).
Step 9: Add a Black Bead and Continue Through Gold Beads
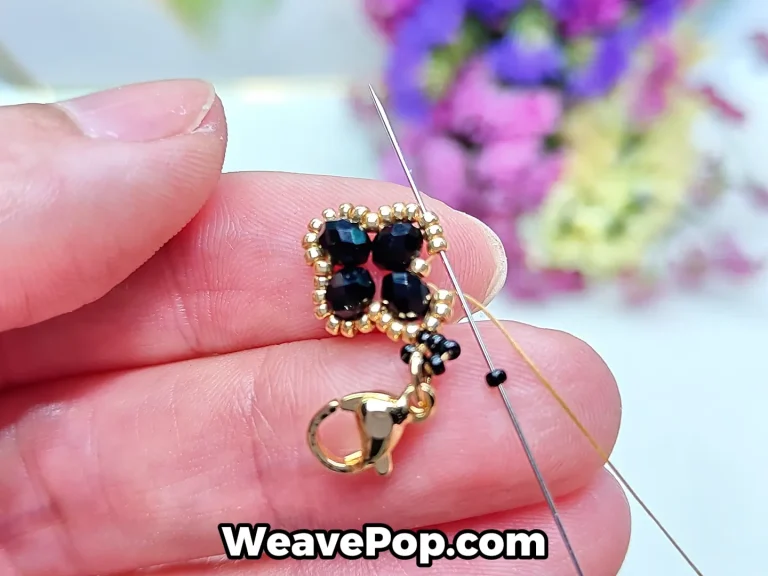
Add 1 black seed bead, then pass the needle forward through 3pcs gold seed beads.
Step 10: Add Black Beads Between the Gold Beads
As shown, add 1 black seed bead between every 3 gold seed beads.
Step 11: Pass Through the Top Bead and Create the Next Unit
First, pass the thread through the top black seed bead. Then add 3pcs gold seed beads + 1 flat bead + 3pcs gold seed beads, and pass the needle back through the black bead.
Step 12: Continue the Pattern with Gold Beads and Flat Bead
Continue passing the thread through 3pcs gold seed beads + 1 flat bead.
Step 13: Add Alternating Beads and Tighten to Shape the Pattern
Add 1 gold seed bead + 1 flat bead + 1 gold seed bead + 1 flat bead + 1 gold seed bead + 1 flat bead + 1 gold seed bead. Pass the needle back through the flat bead, then pull tight.
Step 14: Extend the Flower Bead Bracelet to Your Desired Length
Repeat the above steps to continue making units until the bracelet reaches your desired length.
Step 15: Attach the Extension Chain with Black Beads
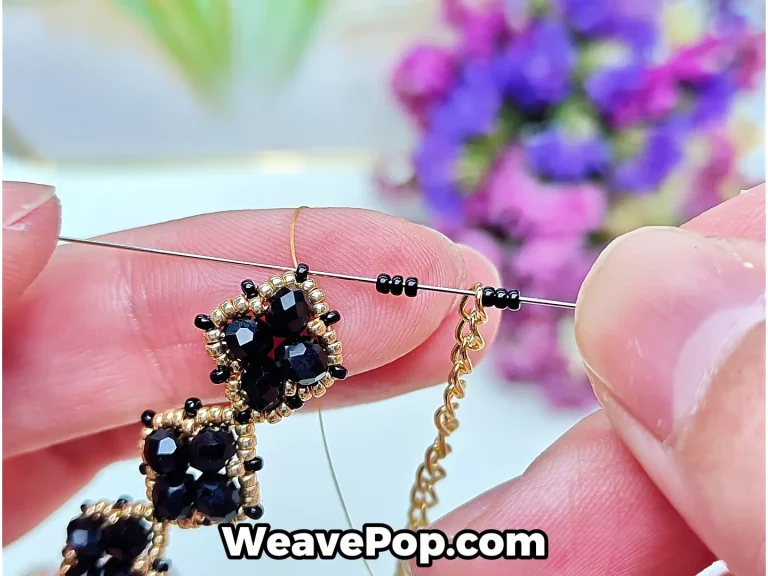
Add 3pcs black seed beads + the extension chain + 3pcs black seed beads, then pass the needle back through one black bead.
Step 16: Finish the Bracelet by Tying a Secure Knot
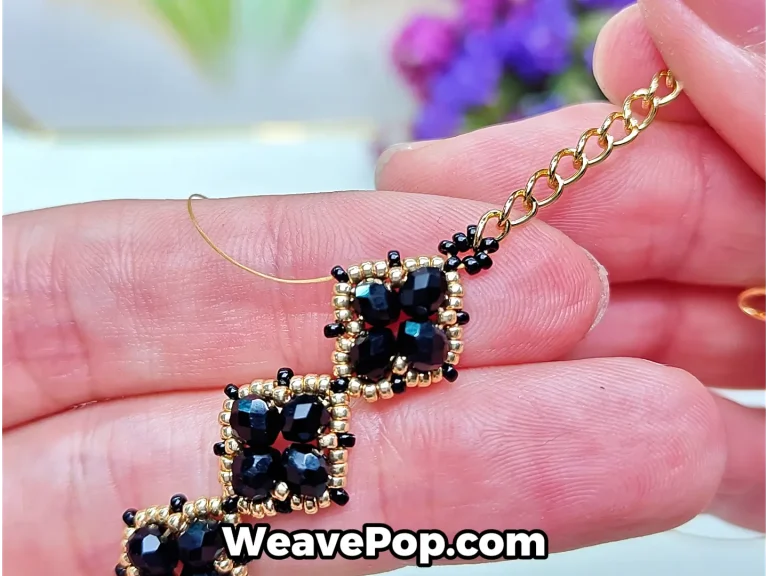
Finish by tying a knot.
Step 17: Complete the Bracelet and Enjoy Your Handmade Design
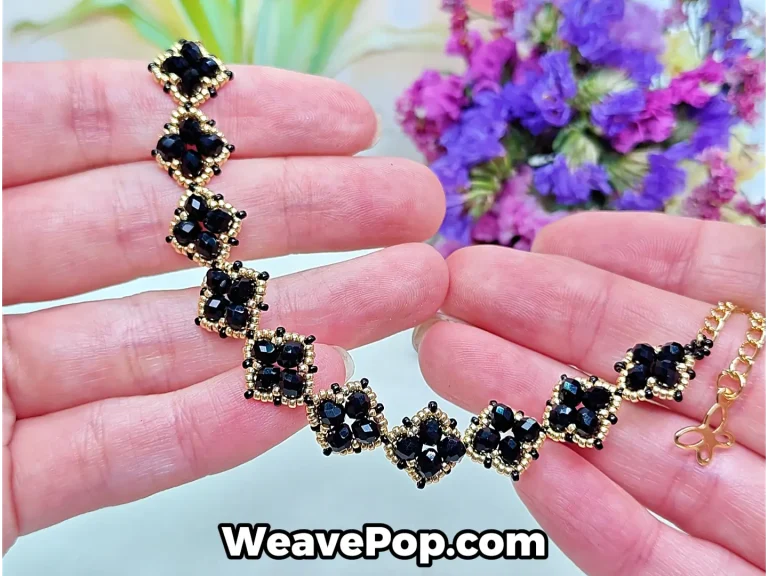
Congratulations! Your flower bead bracelet is now complete. You’ve just created your own beautiful handmade piece.
Want to make more bracelets like this?
👉 Get the exact flower bead bracelet kit used in this tutorial.
Tips for Beginners
If you’re new to bead bracelet making, these simple tips will help you achieve better results:
Keep your thread tension consistent to achieve a clean and even flower pattern.
Use the right bead sizes to maintain the bracelet’s structure and durability.
Practice the pattern slowly at first to avoid mistakes.
- Choose color combinations that highlight the flower design and create contrast.
🎥 Watch the Full Video Tutorial
Prefer watching instead of reading?
Here’s the full step-by-step flower bead bracelet tutorial:
Get the Same Flower Bead Bracelet Kit
Want to make this exact bracelet without the hassle of finding materials?
Our flower bead bracelet kit includes everything you need to get started right away:
✔ Pre-selected beads for this exact design
✔ Beginner-friendly setup
✔ Saves time and avoids mistakes
Get the exact flower bead bracelet kit used in this tutorial.
No need to figure out which beads to use — everything is pre-selected for this exact design.
Ready to make your own?
👇 Start your next bracelet the easy way.
%20|%20B042&url=https://www.weavepop.com/product/bead-bracelet-kit-b042/&media=https://www.weavepop.com/wp-content/uploads/2025/10/B042-2-1-800x800.webp)
Bead Bracelet Kit – Flower Design for Beginners (Black & Gold) | B042
Rated 5.00 out of 5
$12.80 – $22.80Price range: $12.80 through $22.80
This bead bracelet kit features MIYUKI 4202 and 401 seed beads (15/0) combined with 4mm flat beads to create a modern black and gold flower design. A beginner-friendly DIY bracelet kit that includes a step-by-step video tutorial, perfect for adults who enjoy handmade jewelry.
Select options This product has multiple variants. The options may be chosen on the product page