OVER $50 FREE SHIPPING WORLD WIDELY SHIPPING


Materials You’ll Need for This Beading Pattern
Before you begin weaving this seed bead necklace, gather the following materials. We’ve bundled everything into a complete necklace making kit so you can start right away. Watch the full video tutorial on TikTok →
Step 1: Gather Your Materials
Before diving into these intricate beading patterns, lay out all your supplies on a clean, light-colored surface to keep track of small components. For this project, you will need Miyuki 4202 gold seed beads, sparkling 4mm green bicone crystals, and elegant 8mm white pearls to create a luxurious seed bead necklace. Having a complete necklace making kit organized beforehand ensures you have the correct findings, like the gold chain and lobster clasp, ready for the final assembly.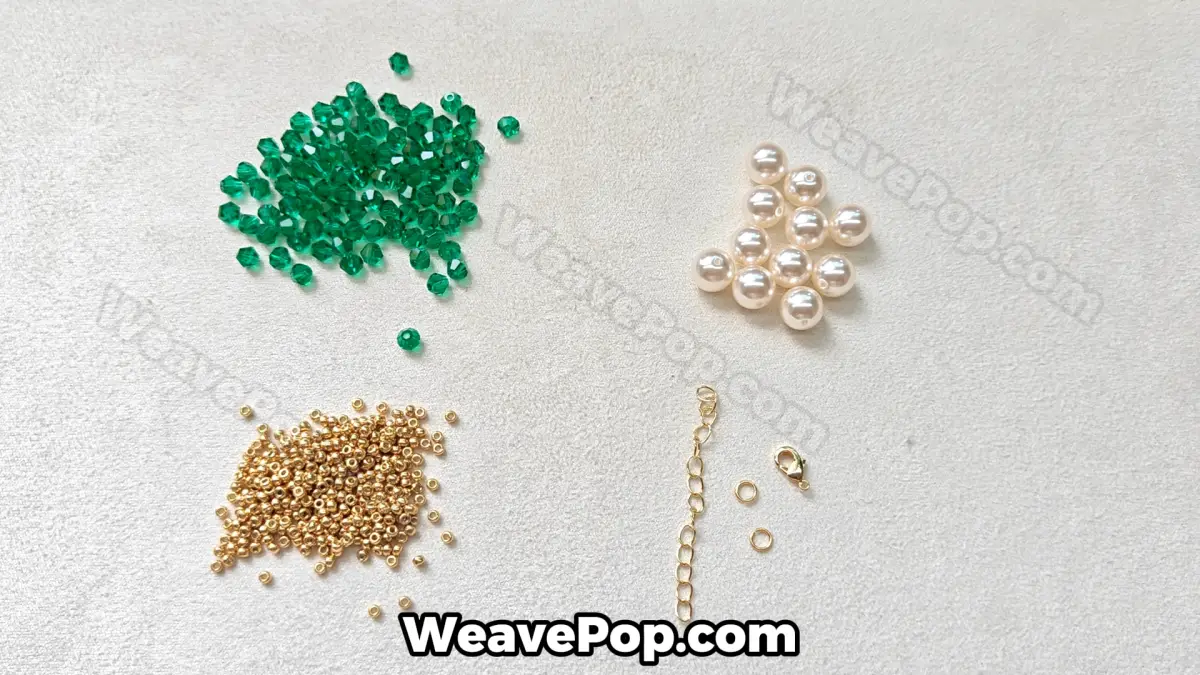
Step-by-Step Beading Pattern Tutorial
Follow along with these 32 step-by-step photos. Each image shows the exact thread path and bead placement so you can weave with confidence. This beading pattern for beginners is designed to be clear and repeatable.Step 2: String the Base Row
Start your crystal bead necklace by threading a gold seed bead followed by a green bicone crystal onto your needle, repeating this sequence until you have four crystals separated by three gold beads. This foundational row is crucial for many beading patterns as it establishes the width and structure of your pendant’s core. Be sure to leave a generous tail of thread, about 6 inches, which you will use later to weave back in and secure your seed bead necklace.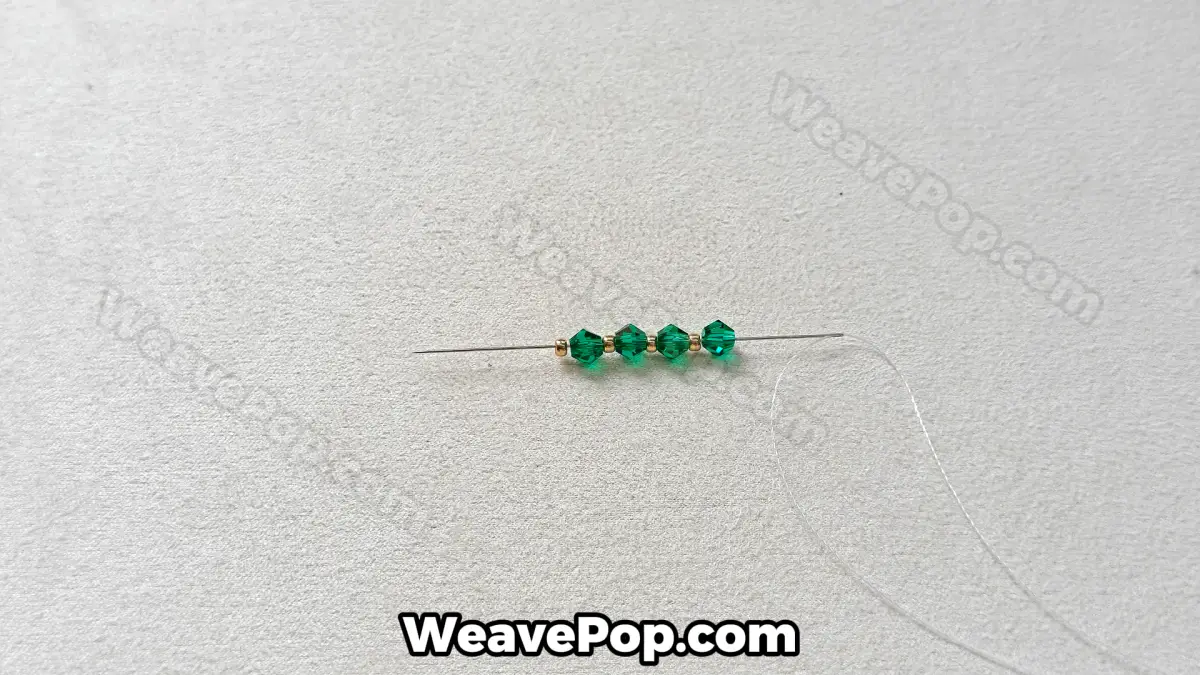
Step 3: Form the Crystal Loop
Gently pull the working thread to bring the two ends of your strung beads together, forming a small, tight loop with the green crystals. This technique is a staple in every beading pattern for beginners because it creates a stable, circular base for adding subsequent layers of beads. As you tighten the circle, ensure the gold seed beads sit neatly at the “corners” between the crystals to maintain the geometric integrity of your seed bead necklace.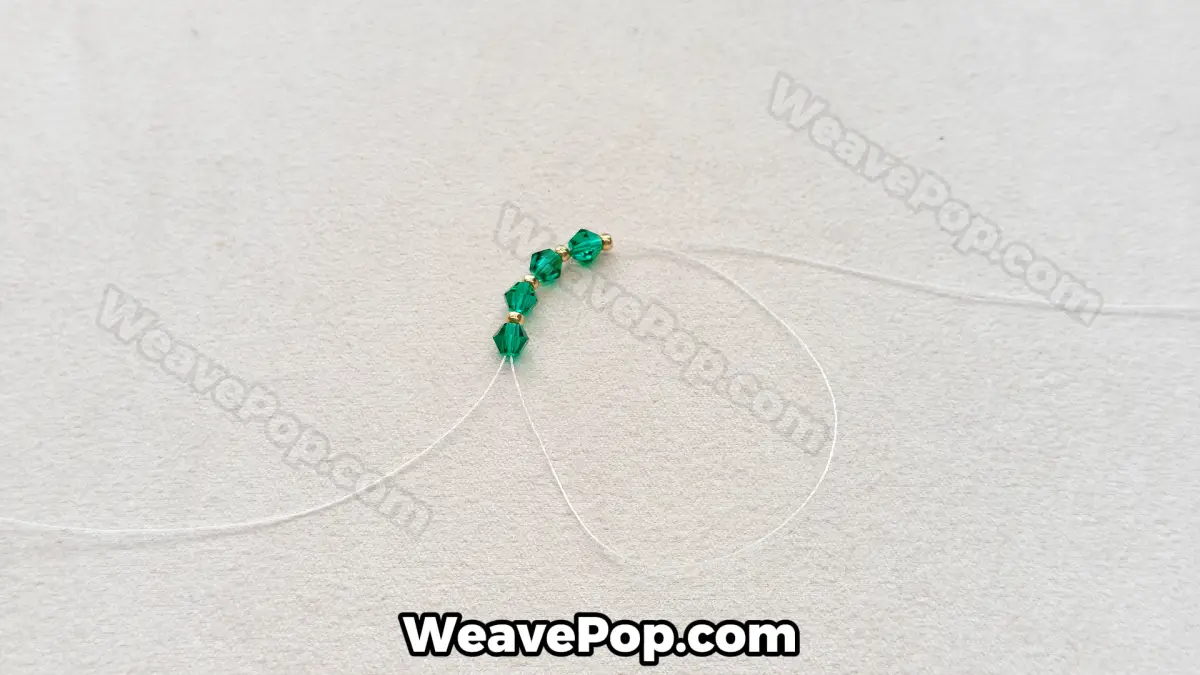
Step 4: Reinforce the Shape
Pass your needle back through the adjacent beads in the opposite direction to reinforce the square shape and ensure the tension is perfectly even. In detailed beading patterns, this reinforcement step is vital to prevent the pendant from twisting or losing its form as you add weight with pearls later. You should now have a secure, flat square of green crystals, which serves as the centerpiece for your seed bead necklace.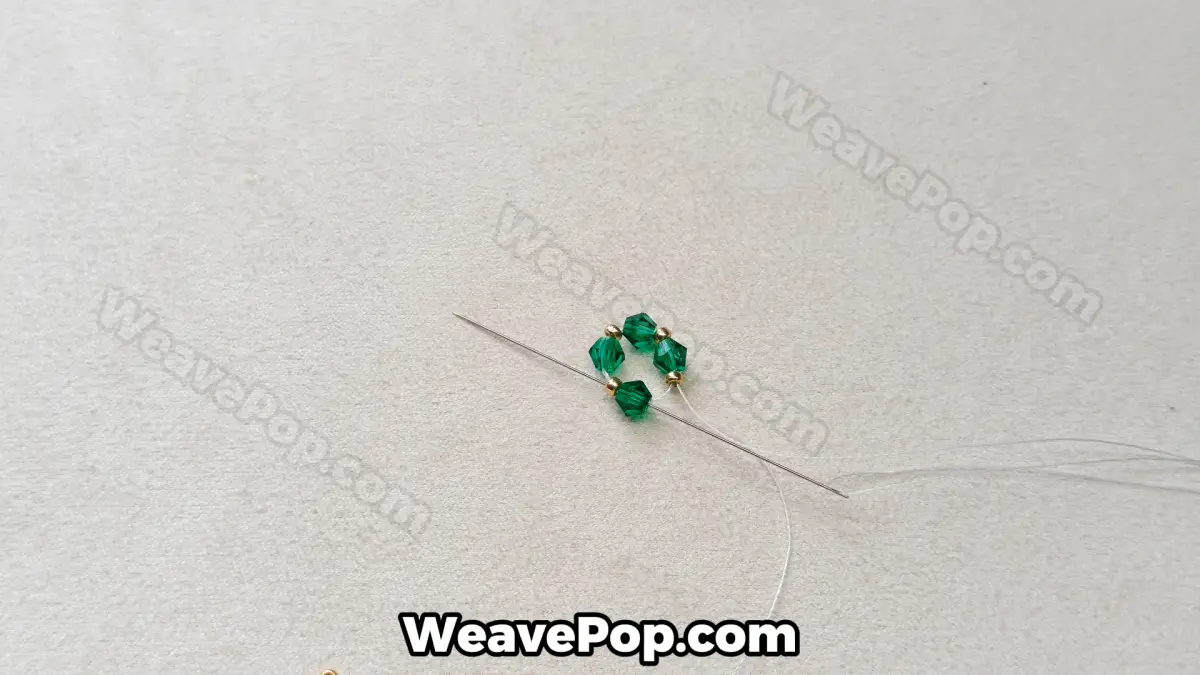
Step 5: Build the Bail Extension
Exit the top gold seed bead of your crystal square and pick up three additional gold seed beads to begin building the bail or drop extension. Mastering this specific thread path is essential when learning how to finish a beaded necklace with a clasp, as it creates a sturdy attachment point for your chain. Continue following these beading patterns to build up the height of your pendant, ensuring the gold beads align vertically for a polished look.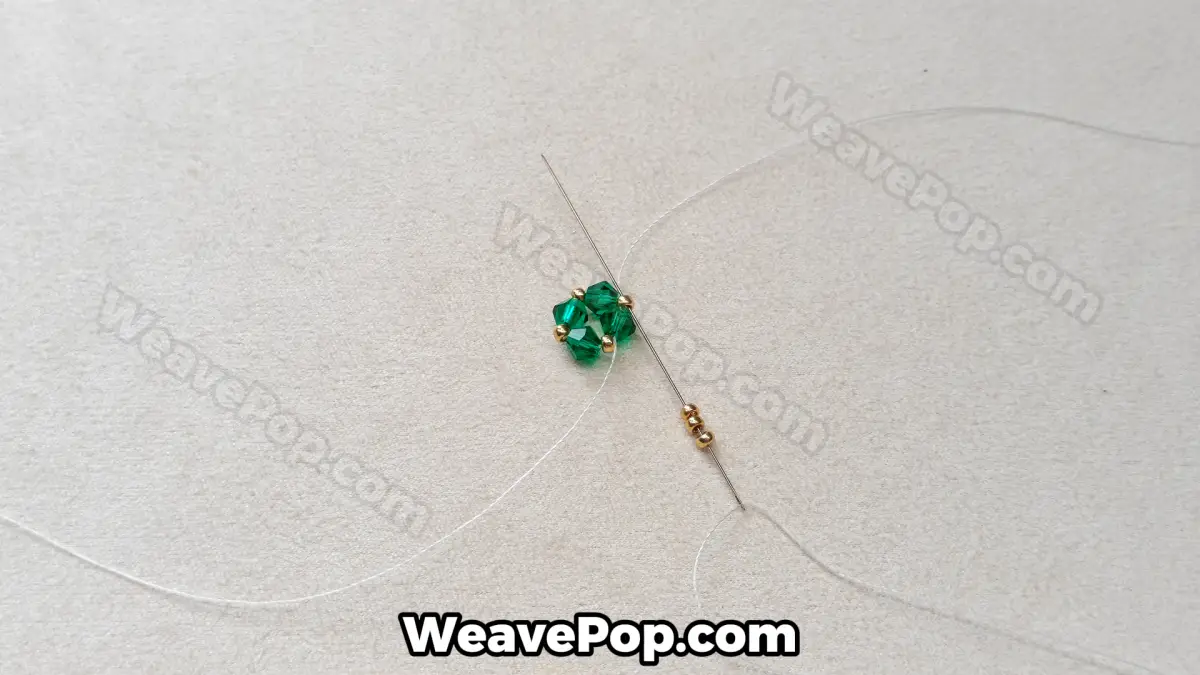
Step 6: Add Side Accents
In this stage of your beading patterns, you’ll add a small cluster of gold seed beads to the side of your green crystal square. This detail adds a touch of elegance and prepares the structure for the next layer of your seed bead necklace. Make sure to pass your needle through these new beads twice to secure them firmly, as loose seed beads can ruin the symmetry of your design.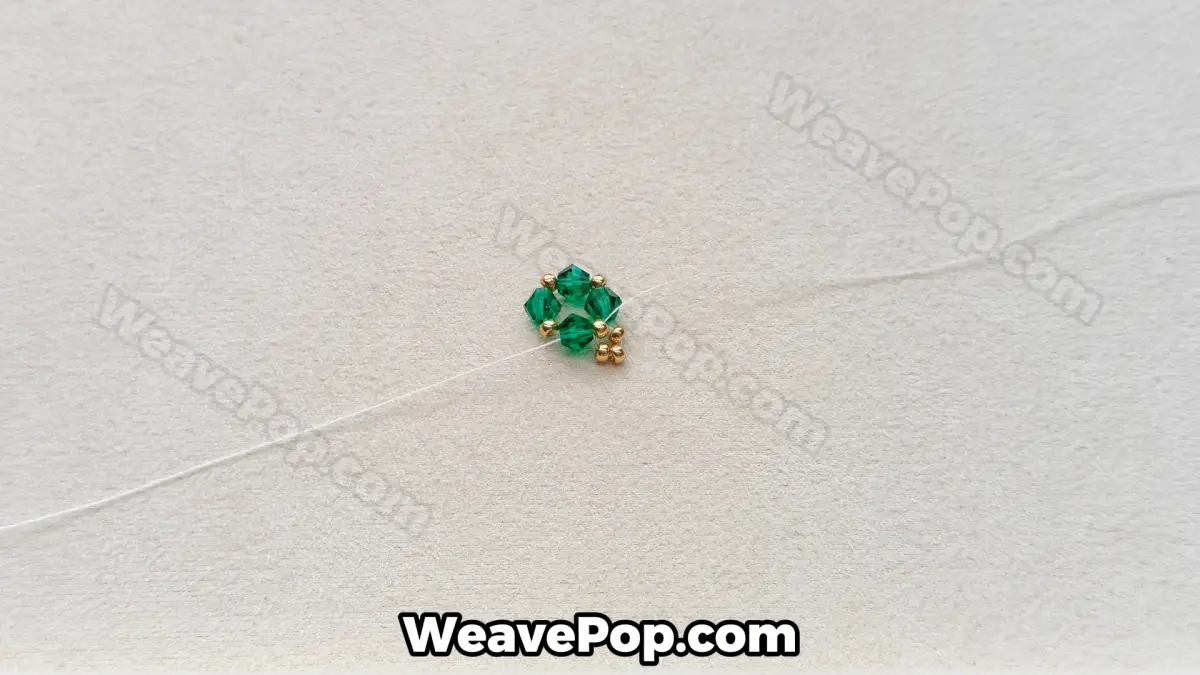
Step 7: Reinforce the Connection
Now, guide your needle back through the adjacent gold beads to reinforce the connection point. This step is crucial in any beading pattern for beginners and complex beading patterns alike because it ensures the tension is even and the components won’t shift. By retracing your path, you are building a durable foundation for the heavy pearl that will follow in your seed bead necklace.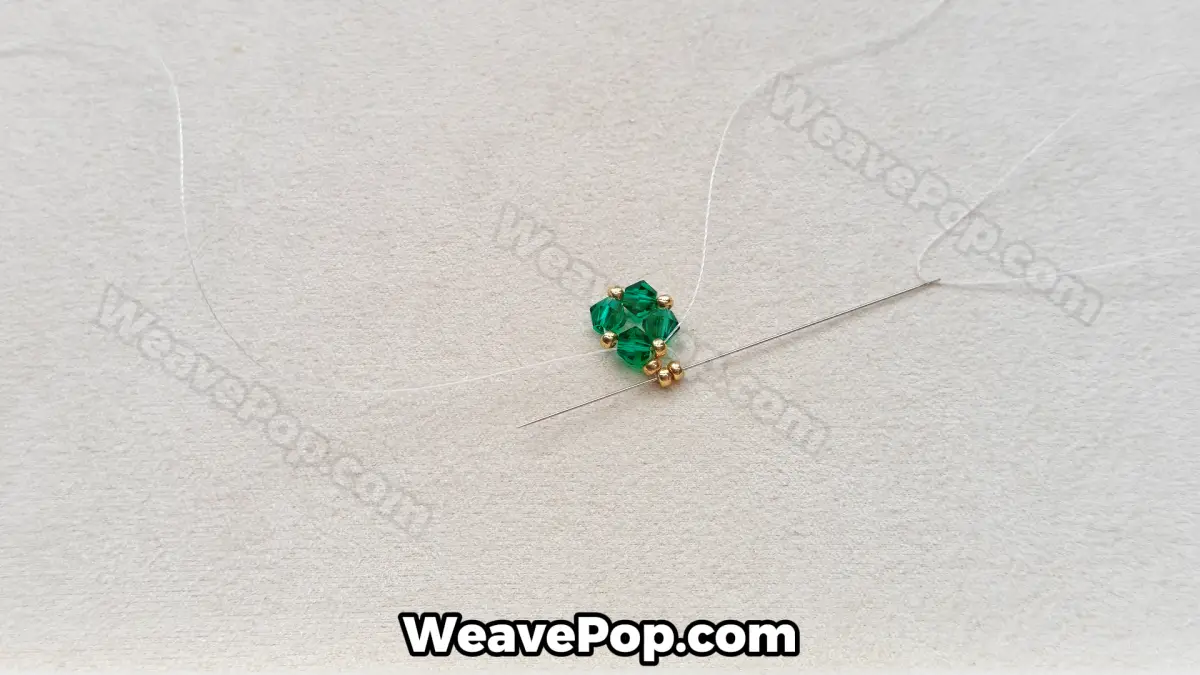
Step 8: Position for the Drop
Exit your needle from the bottom-most gold bead of the cluster you just created. This specific exit point is key to following these beading patterns correctly, as it aligns the drop perfectly centered under the crystal element. Take a moment to check your tension; the green crystals should sit flat while the gold beads form a neat little loop for the next step of your seed bead necklace.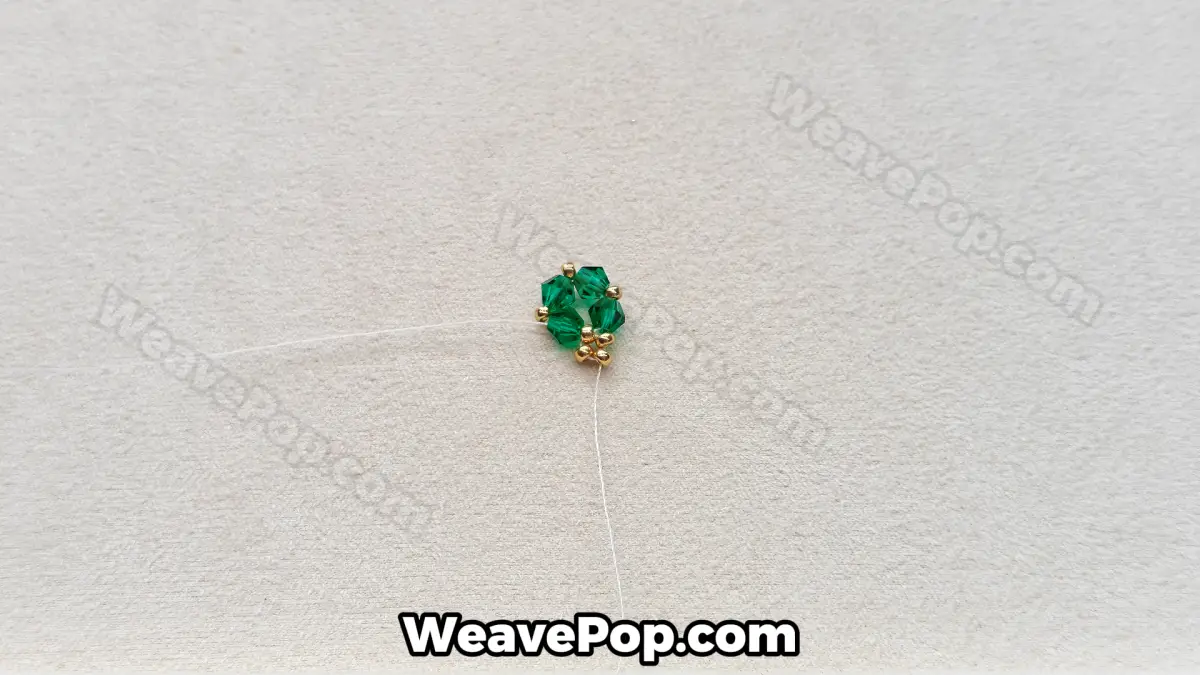
Step 9: String the Pearl
It’s time to introduce the focal point by stringing a large white pearl followed by a single gold seed bead. This combination transforms your project into a stunning crystal bead necklace with a vintage drop aesthetic. The gold seed bead acts as a stopper, preventing the pearl from sliding too far down while adding a professional finish to your seed bead necklace and beading patterns.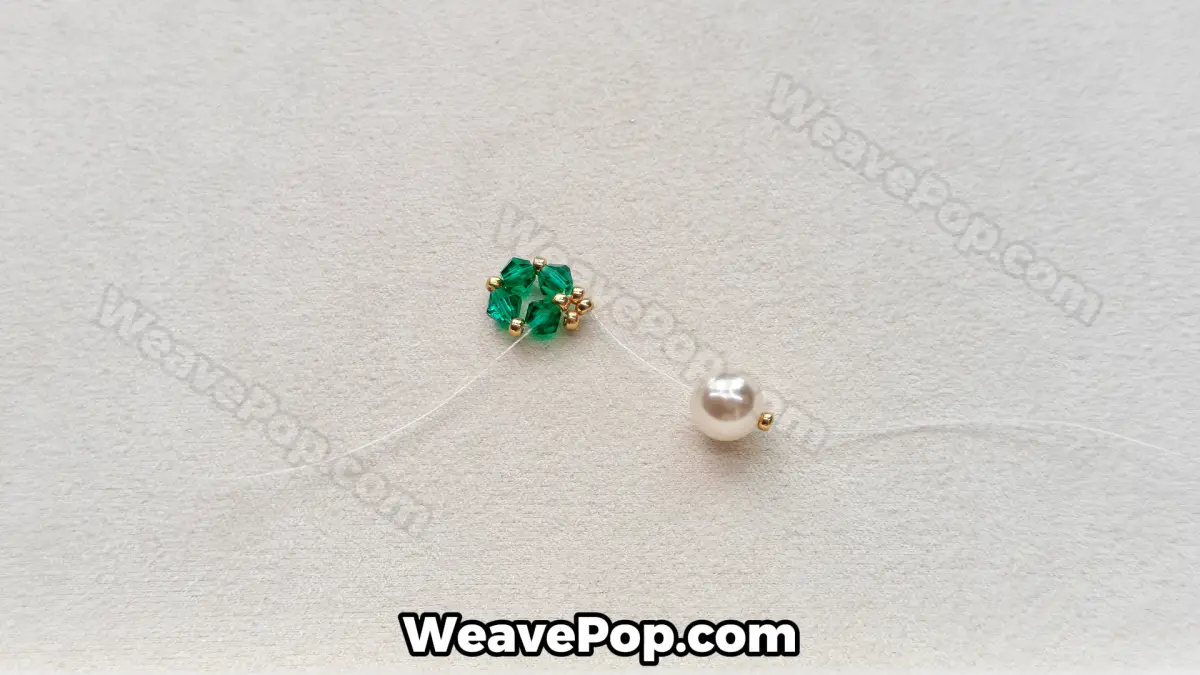
Step 10: Secure the Pearl Drop
Pass your needle back down through the pearl and the gold seed bead to lock it in place. This technique is essential when learning how to finish a beaded necklace with a clasp later, as it teaches you how to create secure loops that can withstand wear. Once the pearl is secure, your pendant is taking shape, and you are well on your way to completing this beautiful seed bead necklace.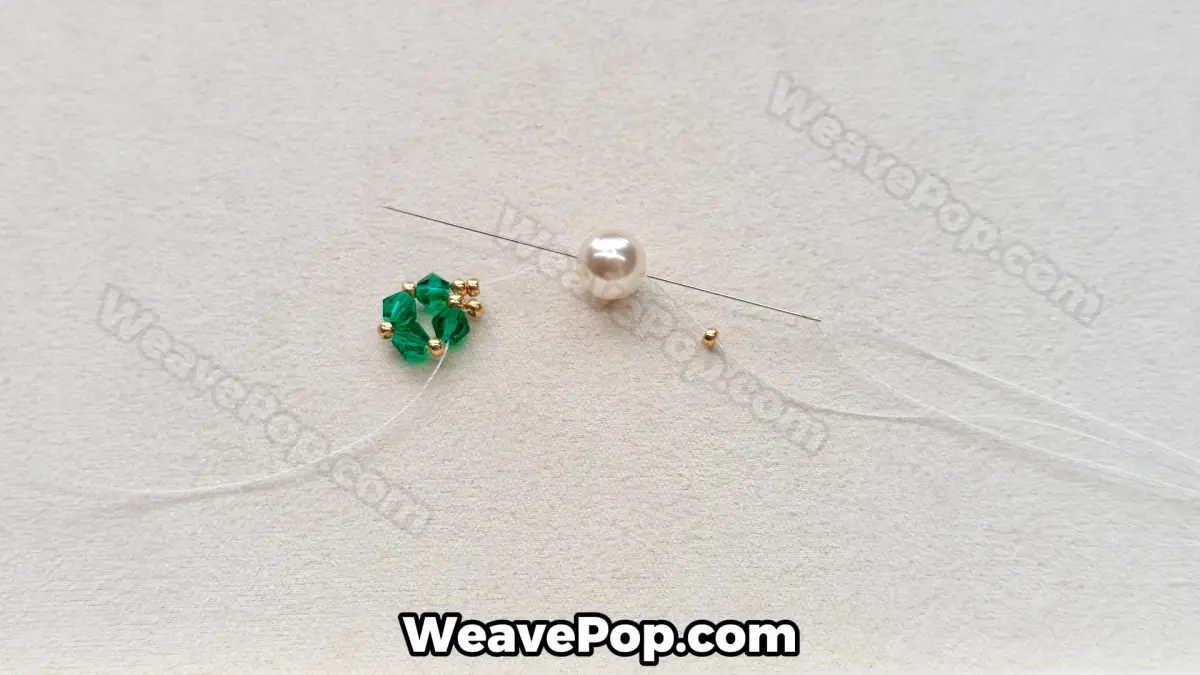
Step 11: Secure the Pearl Drop
Now that your pearl drop is attached, pull the thread firmly to snug it against the gold seed beads. In many beading patterns, securing the focal bead is critical before expanding the design to ensure it hangs correctly. Exit your needle through the top-right gold seed bead of the original green square to prepare for the next section of your seed bead necklace.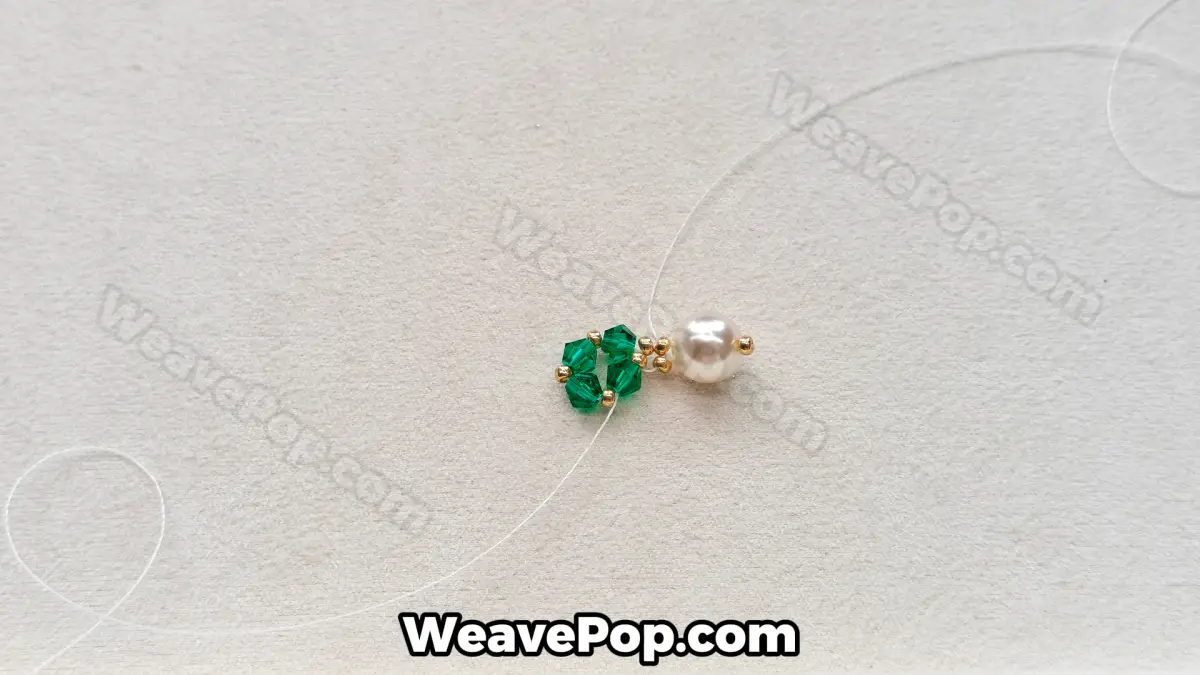
Step 12: Reinforce the Structure
Pass your needle back through the adjacent gold beads to reinforce the connection point. This extra pass ensures that the weight of the pearl won’t distort the shape, a common tip in any beading pattern for beginners. You want your crystal bead necklace pendant to lie flat and symmetrical, so take your time to tighten the thread without breaking it.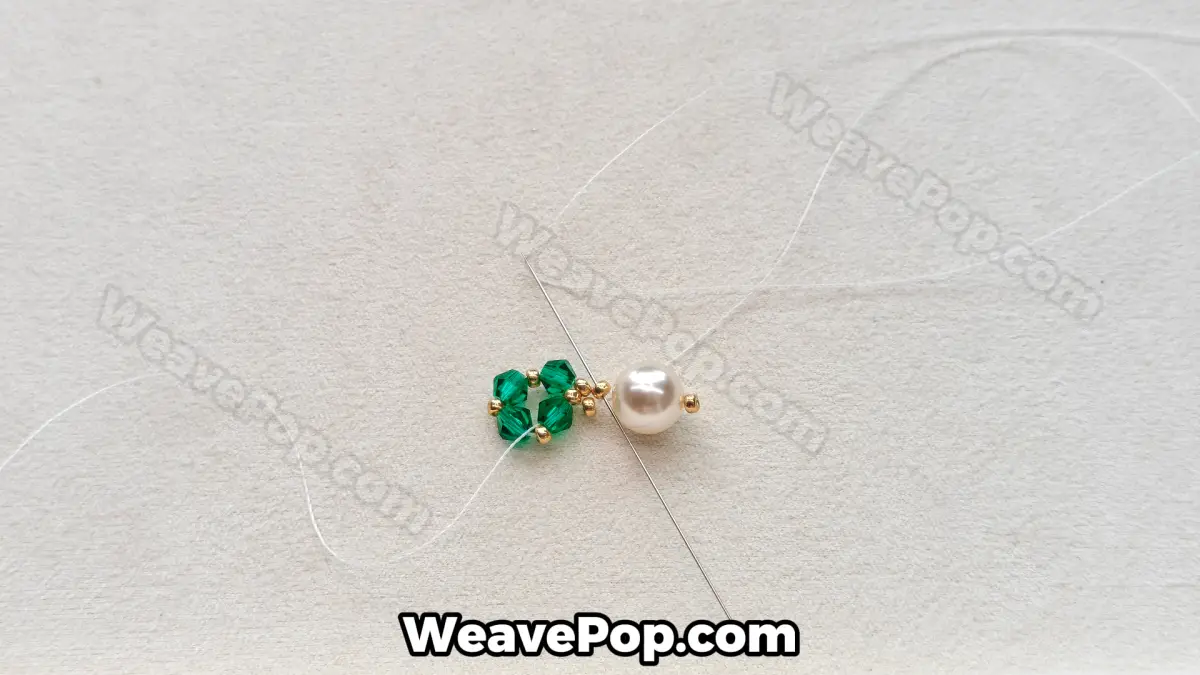
Step 13: Prepare for Expansion
Your thread should now be exiting the top-right corner, perfectly positioned to build the second cluster. This is where the design starts to grow, transforming from a simple drop into a more complex vintage style. If you are using a necklace making kit, this is the moment where your patience pays off as the intricate details emerge in your seed bead necklace.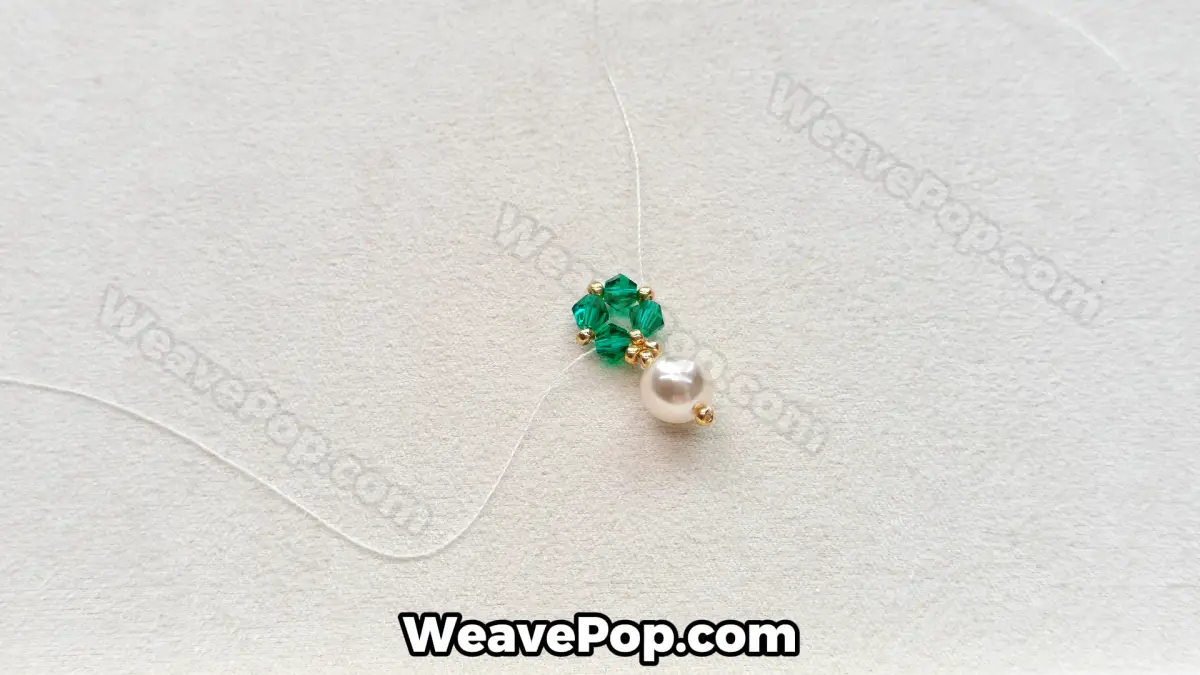
Step 14: String the Second Cluster
Pick up three green bicone crystals, separating each with a gold seed bead, just like you did for the first square. This repetition is the heart of these beading patterns, creating a consistent and professional look. You are essentially building a second “arm” for the pendant that will mirror the first section, adding more sparkle to your piece.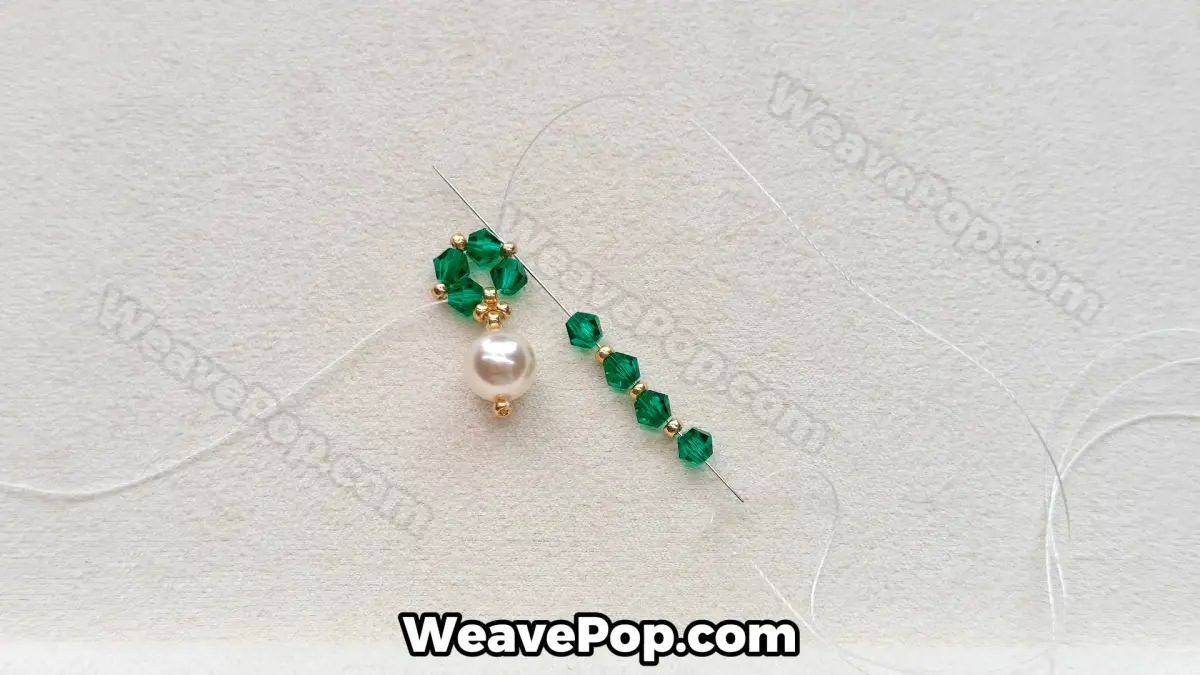
Step 15: Connect and Form the Second Square
Pass your needle through the top-right gold bead of the original square to close the loop and form a second crystal cluster. This technique creates a beautiful double-square shape that adds volume and elegance to your pendant. As you learn how to finish a beaded necklace with a clasp later, you’ll appreciate how sturdy this double-cluster base is for attaching the chain to your seed bead necklace.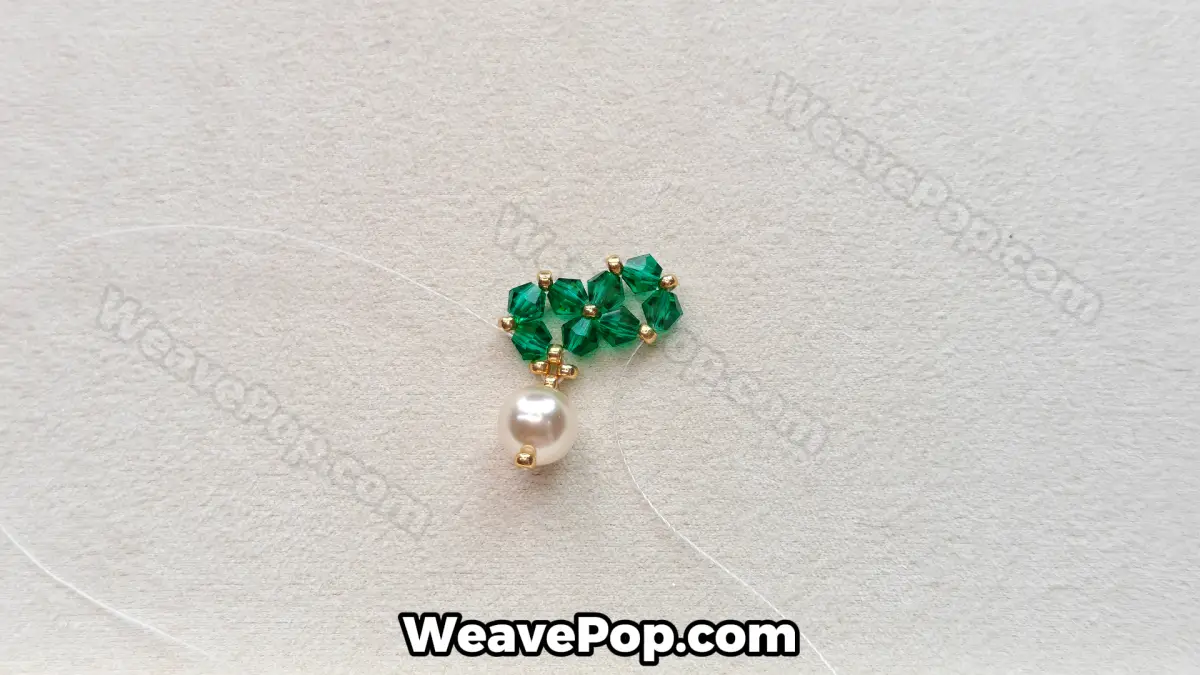
Step 16: Create the Second Connector
Exit your needle from the outer corner of the second green crystal square and pick up three gold seed beads. This small cluster acts as the anchor for your second drop, maintaining the symmetry essential to these beading patterns. By mirroring the first section, you ensure your seed bead necklace has a balanced, professional appearance.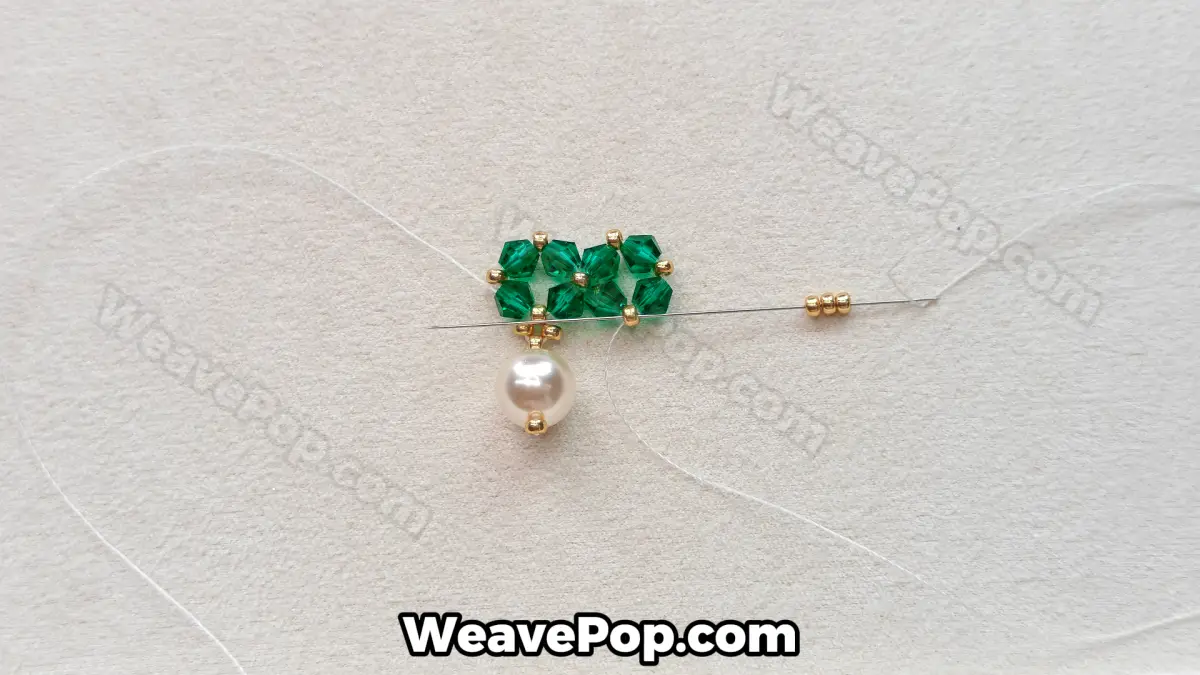
Step 17: Reinforce the Gold Beads
Pass your needle back through these three gold beads to reinforce the connection point. This extra pass is a great habit to develop, especially when following a beading pattern for beginners, as it prevents the beads from shifting under the weight of the pearl. Ensure the gold beads sit snugly against the green crystals before moving on.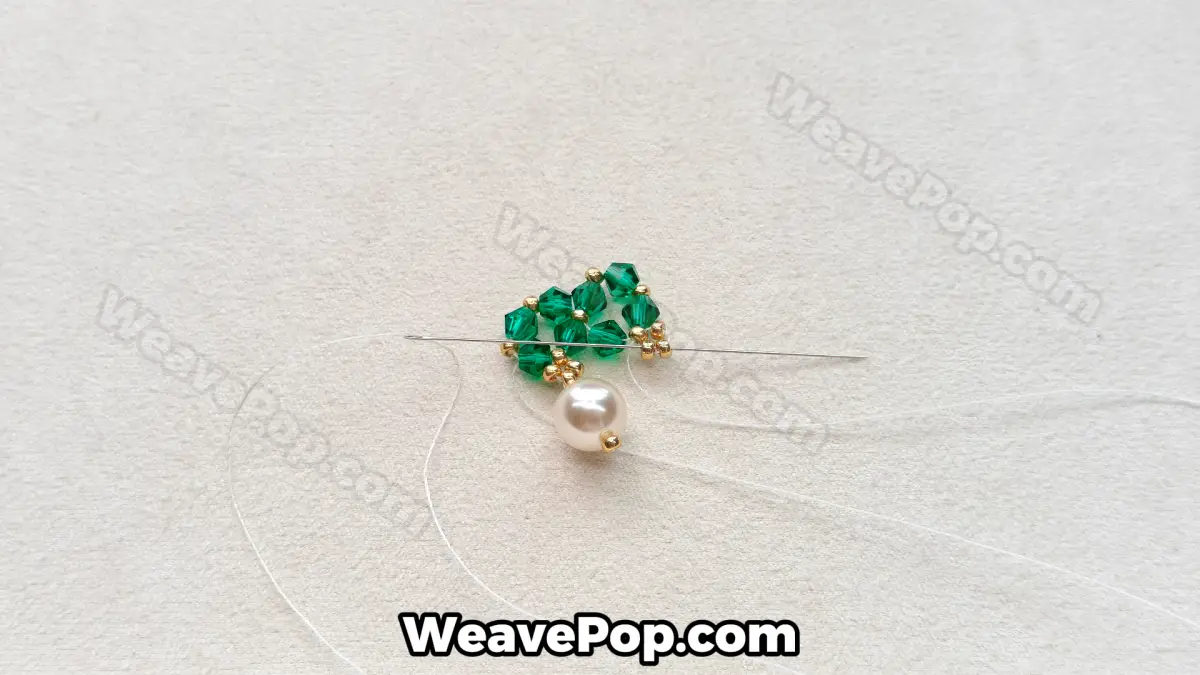
Step 18: Add the Second Pearl
String a second 8mm white pearl followed by a single gold seed bead onto your thread. This step adds a lovely cascading effect to your pendant. If you are working from a necklace making kit, you should have all the necessary pearls ready to create this elegant double-drop design.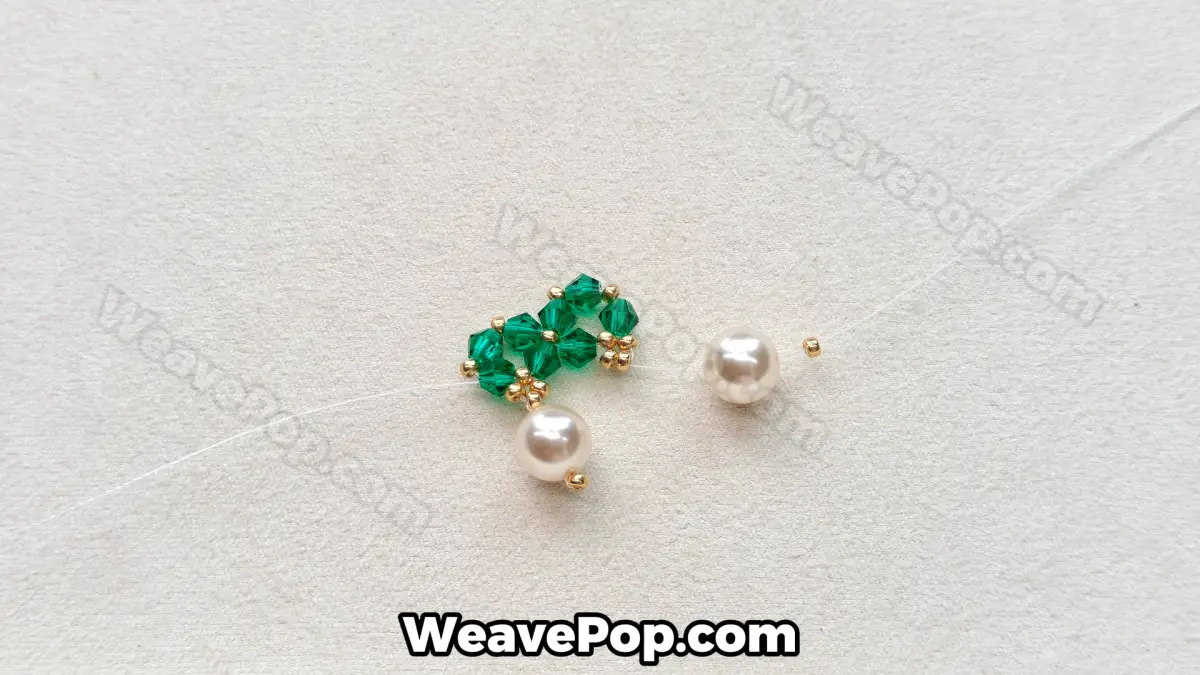
Step 19: Secure the Second Drop
Guide your needle back down through the pearl and the gold seed bead to lock it in place. This technique secures the focal point of your crystal bead necklace and ensures it hangs straight. Pull the thread gently but firmly to remove any slack without distorting the shape of the pendant.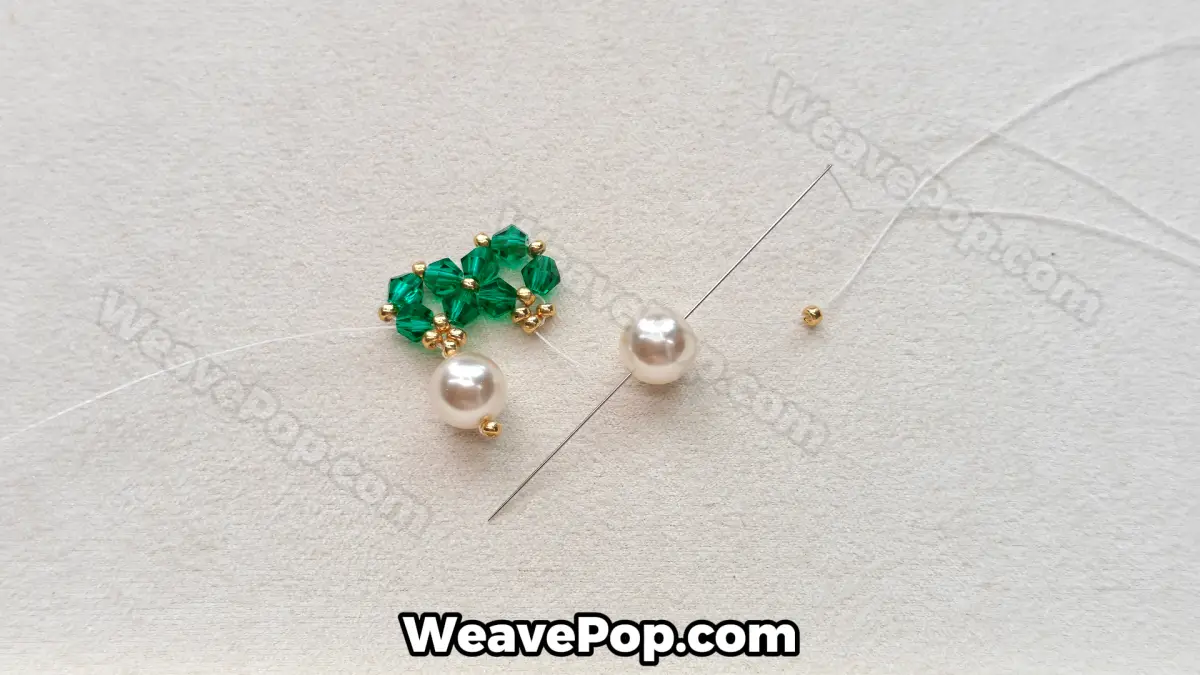
Step 20: Final Reinforcement
Weave your needle back up through the gold connector beads and into the main body of the green crystal squares. This final reinforcement step is crucial before you learn how to finish a beaded necklace with a clasp, as it ensures the pendant is sturdy enough for daily wear. Your pendant is now complete and ready for the chain!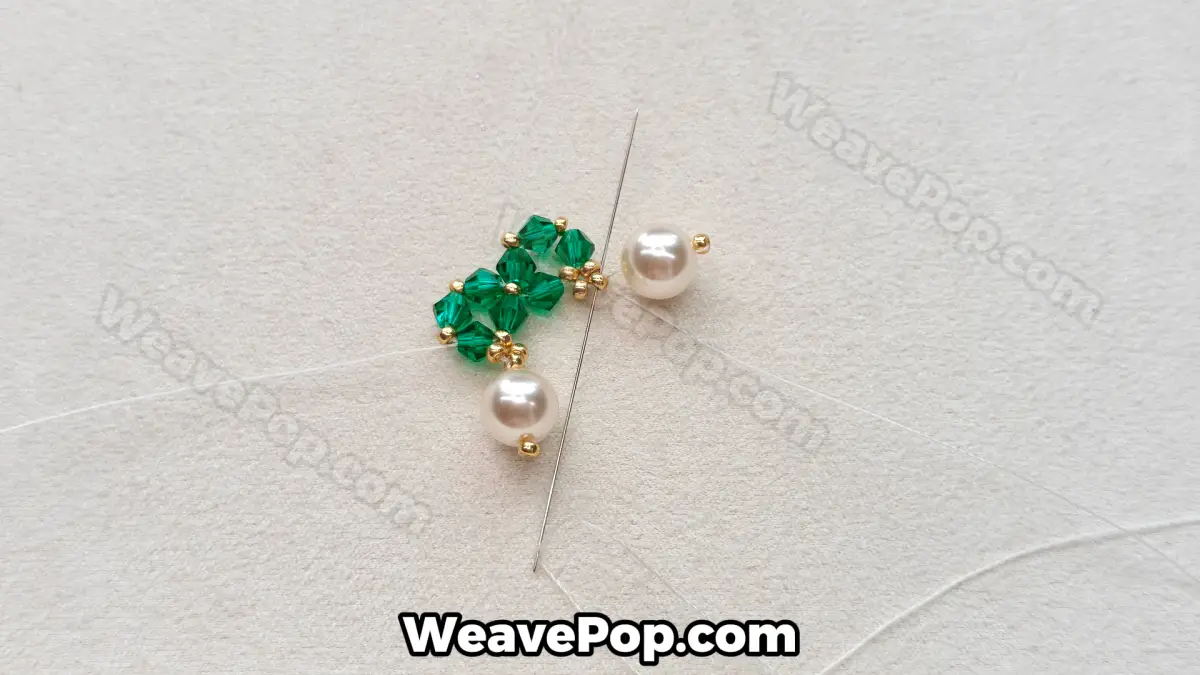
Step 21: Complete the First Pendant Unit
You have successfully created the first double-drop pendant unit! This foundational block is the core of many elegant beading patterns, establishing the rhythm for the rest of the piece. Take a moment to admire how the emerald green crystals and white pearls complement each other before moving on. Now, you are ready to repeat this sequence to build the full length of your seed bead necklace.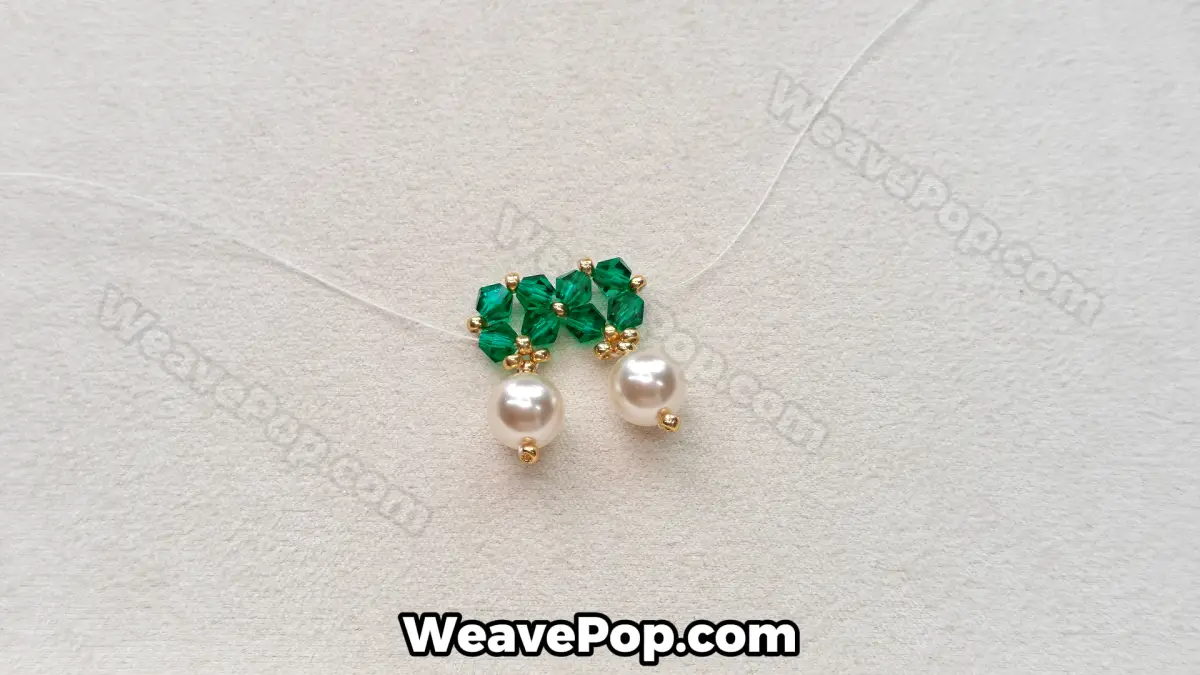
Step 22: Repeat the Pattern for Length
Continue repeating the previous steps—adding green crystal squares and pearl drops—until your necklace reaches your desired length. This repetition is what makes this a perfect beading pattern for beginners, as you simply master one module and replicate it across the chain. The result is a stunning, uniform crystal bead necklace that drapes beautifully around the neck.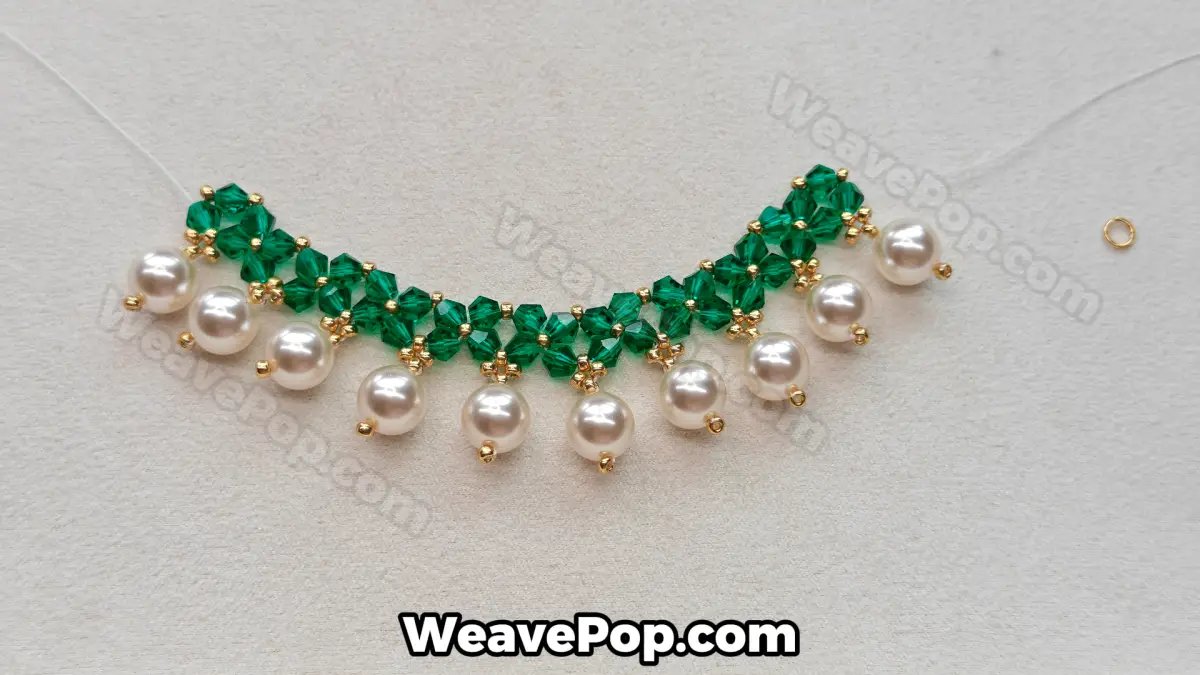
Step 23: Add the End Connector
Once your beaded chain is long enough, it’s time to prepare for the findings by adding a connector. String three to four gold seed beads onto the end of your thread to create a small, sturdy loop. If you are using a necklace making kit, this step is crucial for attaching the lobster clasp securely. This small detail is key when learning how to finish a beaded necklace with a clasp properly.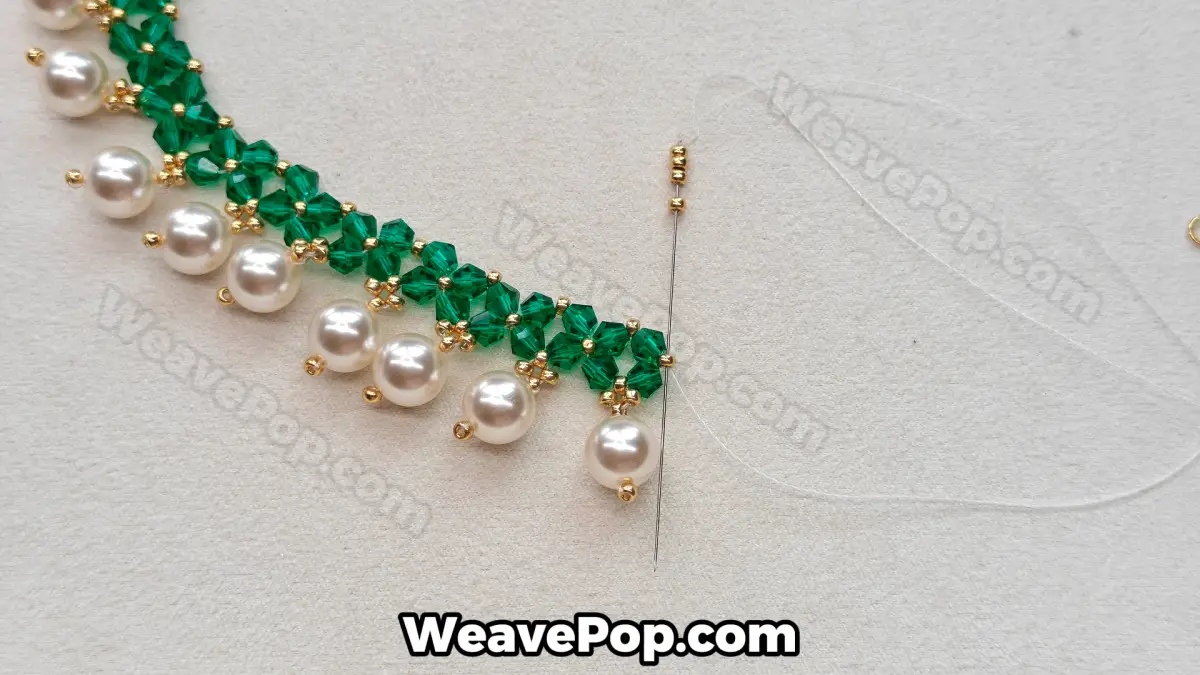
Step 24: Reinforce the End Beads
Pass your needle back through these gold seed beads to reinforce the connection point. In detailed beading patterns, reinforcing the ends prevents the clasp from pulling out over time and ensures longevity. Ensure these beads sit tightly against the final green crystal unit to maintain the professional look of your seed bead necklace.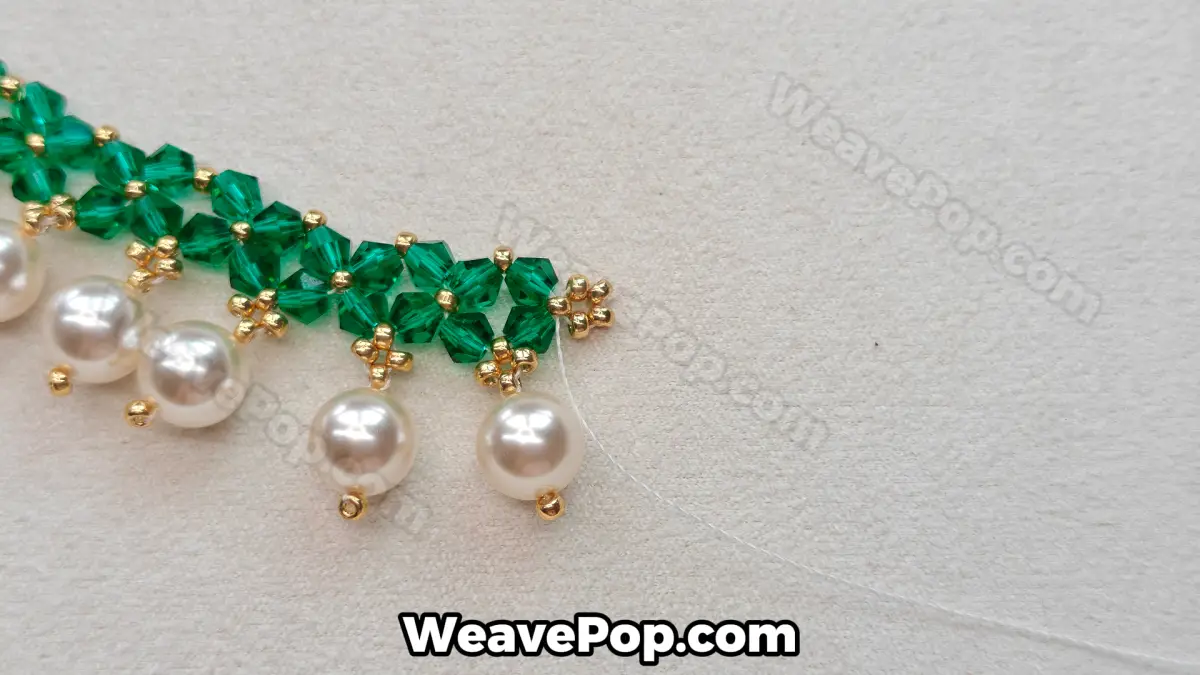
Step 25: Weave in the Thread
Weave your thread back through the top row of green crystals to hide the tail and secure the structure. This “zipping” technique is a standard finish in any beading pattern for beginners to ensure no loose ends are visible or snagging. Your crystal bead necklace body is now complete and ready for the final jump ring and clasp attachment!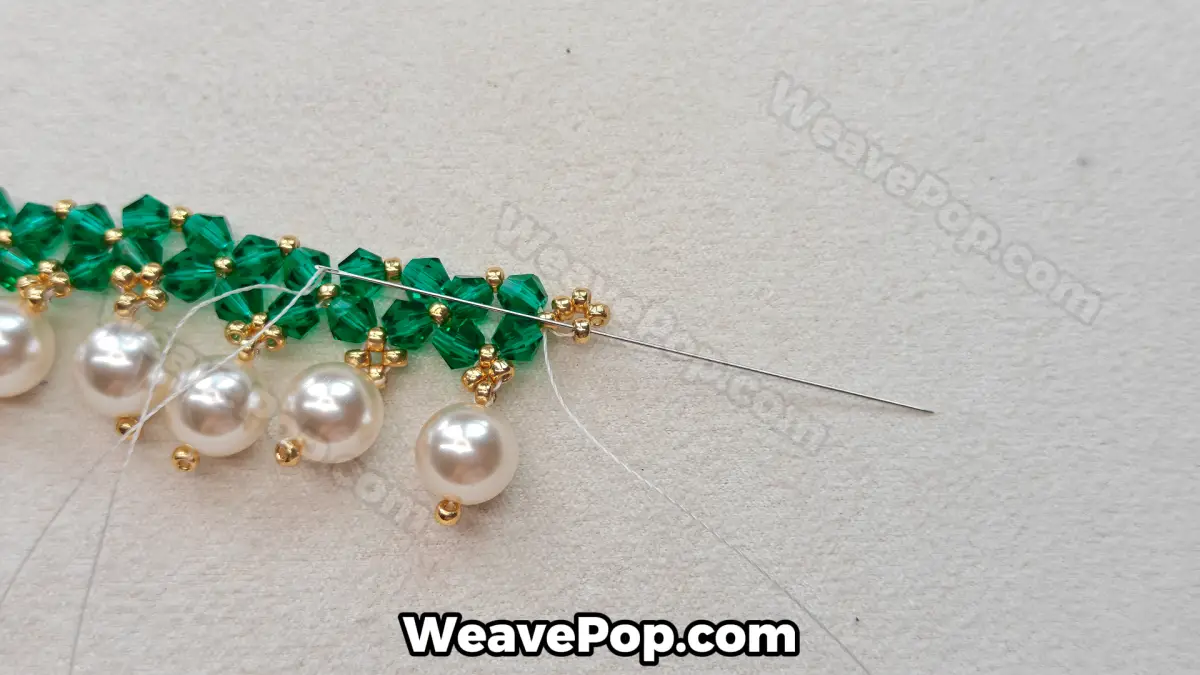
Step 26: Transition to the Chain
Exit your needle from the final gold bead cluster at the end of your green crystal section. This is the critical transition point where you move from the decorative pendant to the chain portion of your seed bead necklace. By exiting here, you ensure that the weight of the pearls is supported by the strongest part of your beading patterns.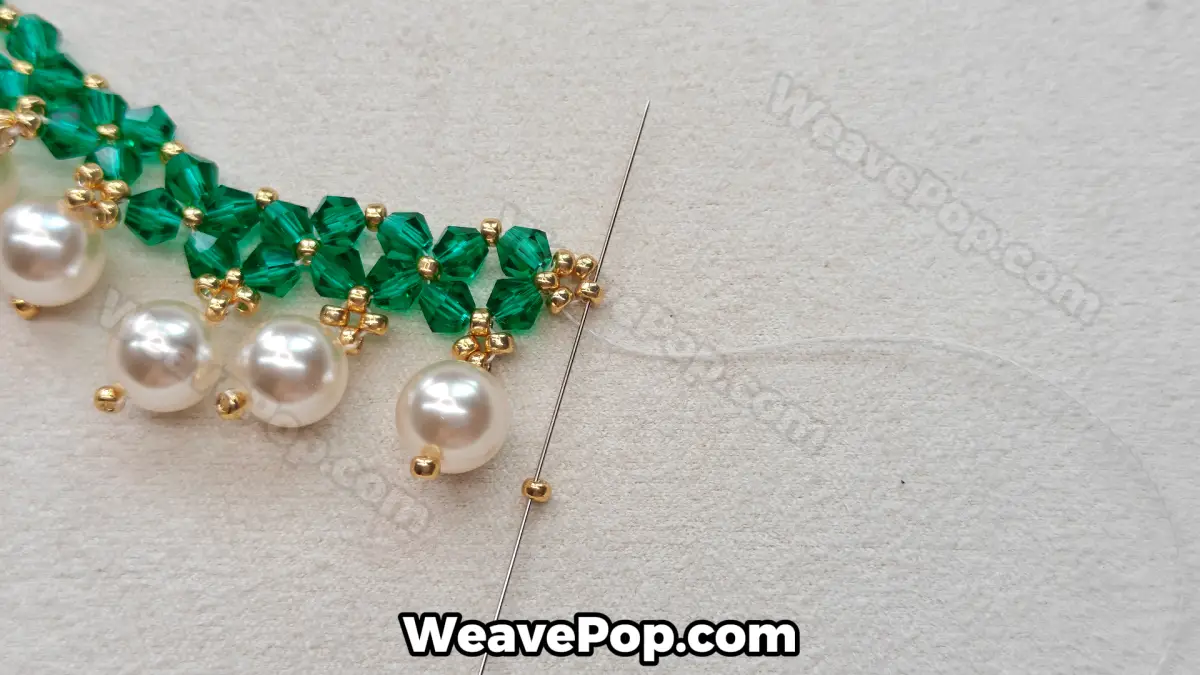
Step 27: Reinforce the Anchor
Pass your needle back through the gold seed beads you just added to create a reinforced loop. In any beading pattern for beginners, reinforcing this connection is vital to prevent the heavy pendant from pulling away from the lighter chain. This step ensures your crystal bead necklace remains durable and secure during wear.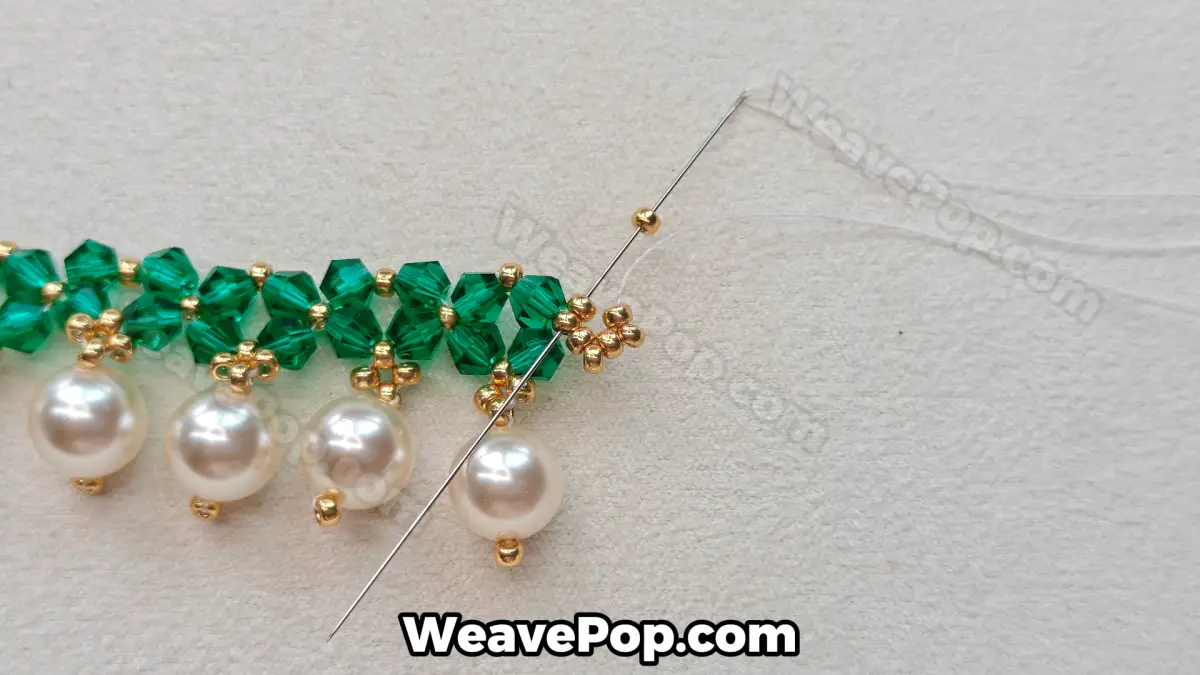
Step 28: Create the Connector Base
You should now have a dense, flower-like cluster of gold beads at the very end of the crystal section. This acts as a sturdy anchor point for the rest of the necklace. If you are using a necklace making kit, this is often where a jump ring would go, but here we are building a seamless, custom seed bead rope that matches the pendant perfectly.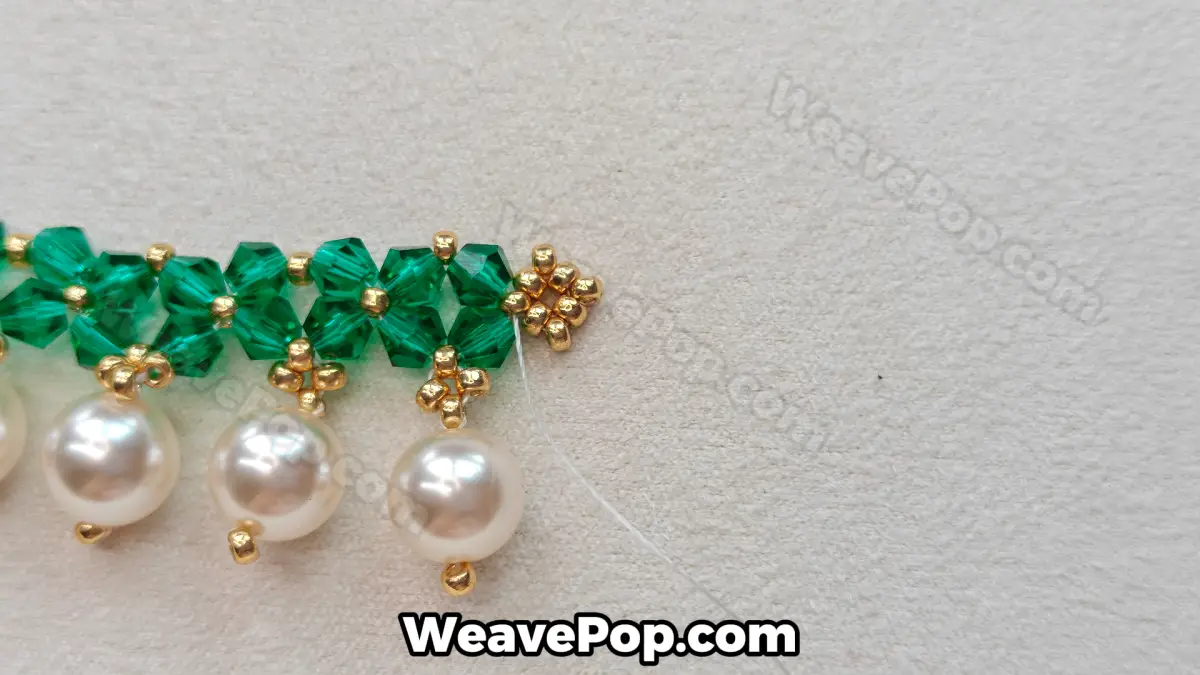
Step 29: Build the Gold Rope
Pick up a long sequence of gold seed beads to begin forming the necklace chain. This technique is a fantastic way to learn how to finish a beaded necklace with a clasp seamlessly, as you are creating a custom rope that integrates directly with your design. The gold beads will provide a luxurious contrast to the green crystals.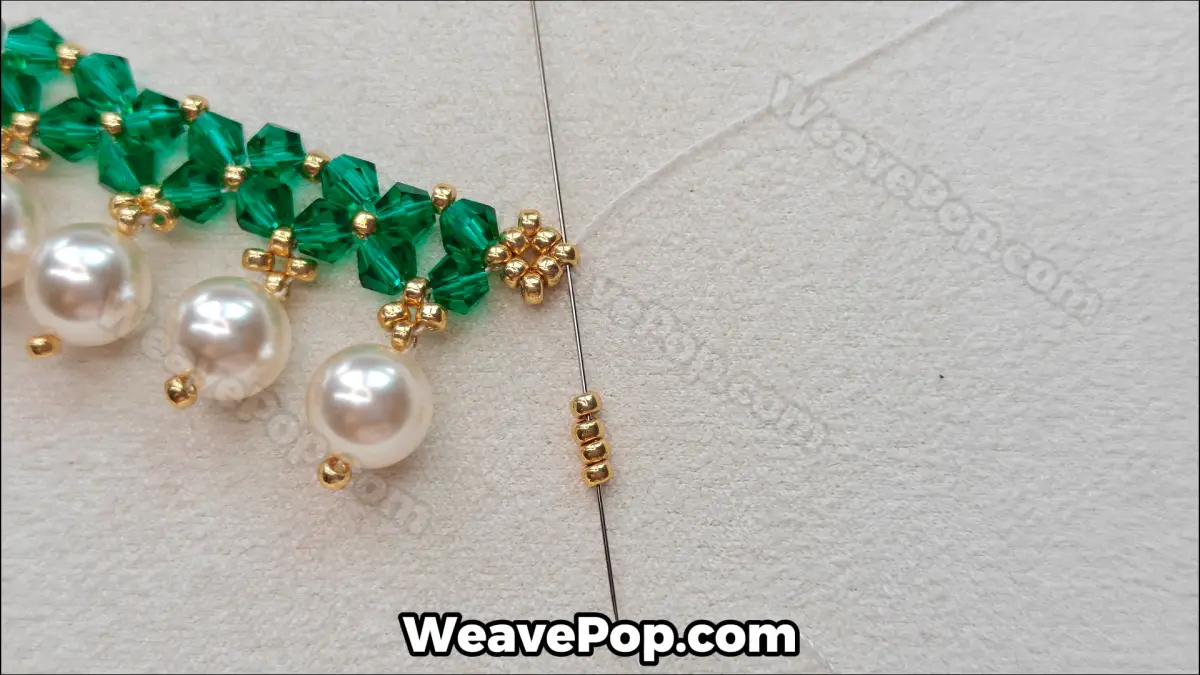
Step 30: Complete the Necklace Structure
Continue this rope pattern until you reach your desired length on both sides of the pendant. The result is a stunning, cohesive piece where the gold seed bead chain complements the green crystals beautifully. You are now ready to attach your clasp to complete this elegant seed bead necklace, following these detailed beading patterns to the very end.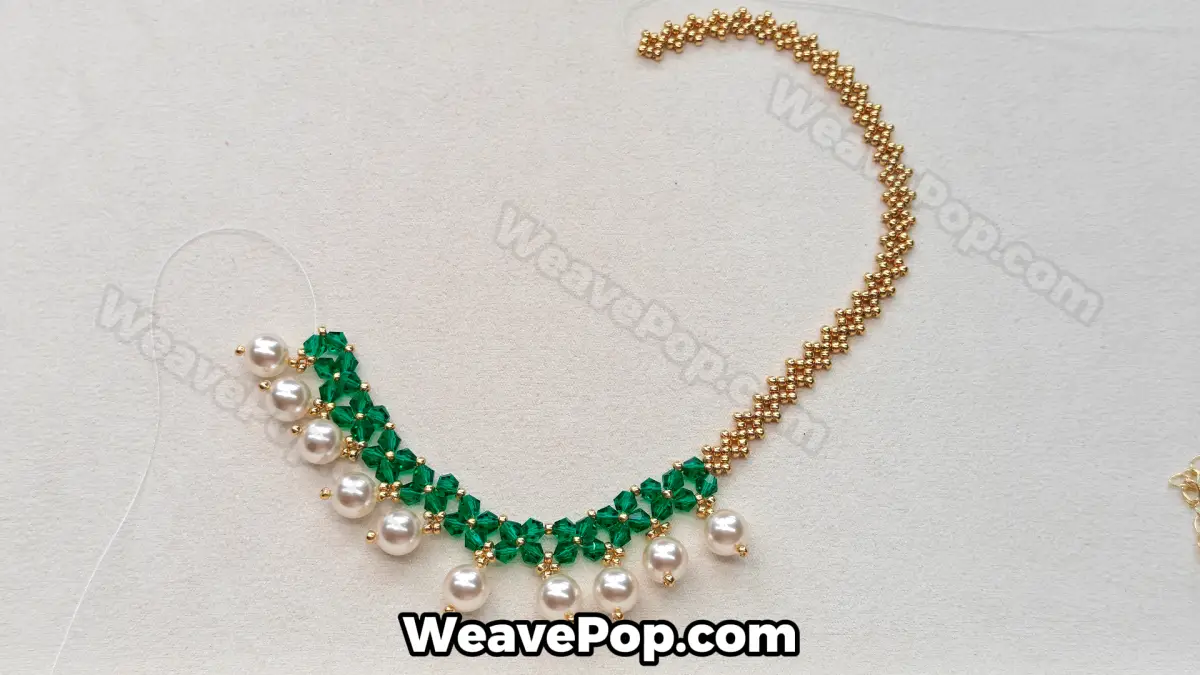
Step 31: Attach the Clasp and Extender
Now that your gold rope is complete, it’s time to learn how to finish a beaded necklace with a clasp. Use small jump rings to attach the lobster clasp to one end of the gold seed bead rope and the extension chain to the other. If you are using a necklace making kit, these findings are usually included and ready to use. Make sure to close the jump rings tightly with pliers to ensure your jewelry stays secure.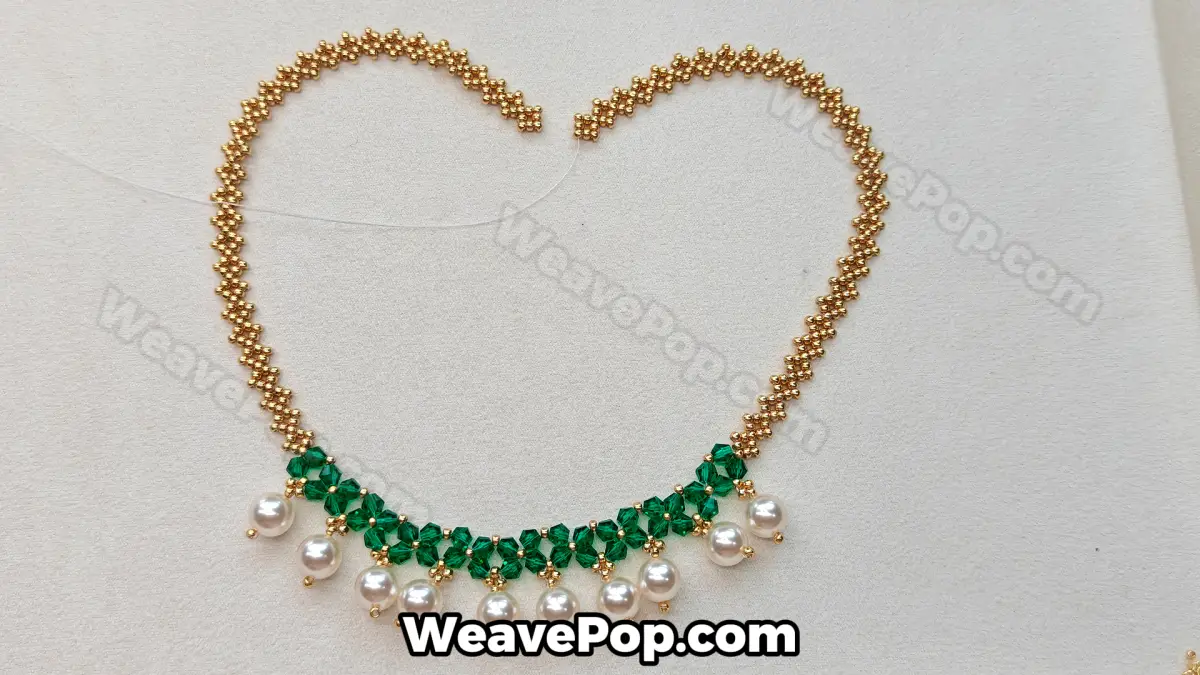
Step 32: Admire Your Finished Masterpiece
Congratulations! You have successfully completed this stunning crystal bead necklace. By following these detailed beading patterns, you’ve created a vintage-inspired piece featuring emerald green bicone crystals and elegant white pearls. This seed bead necklace is perfect for special occasions or adding a touch of glamour to any outfit. Enjoy wearing your handmade creation!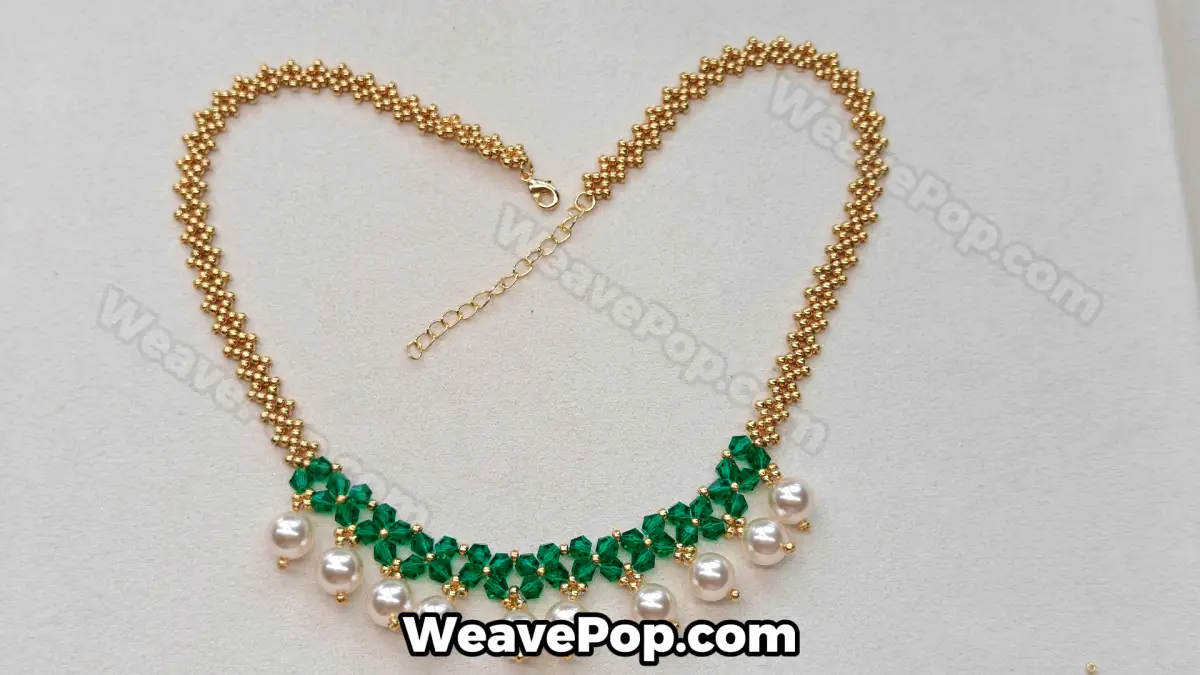
Color Variations – Royal Blue vs Emerald Green
This beading pattern works beautifully in multiple colorways. While this tutorial was shot in Emerald Green, the same technique applies to Royal Blue. Both create stunning handmade beaded necklace ideas for your next project.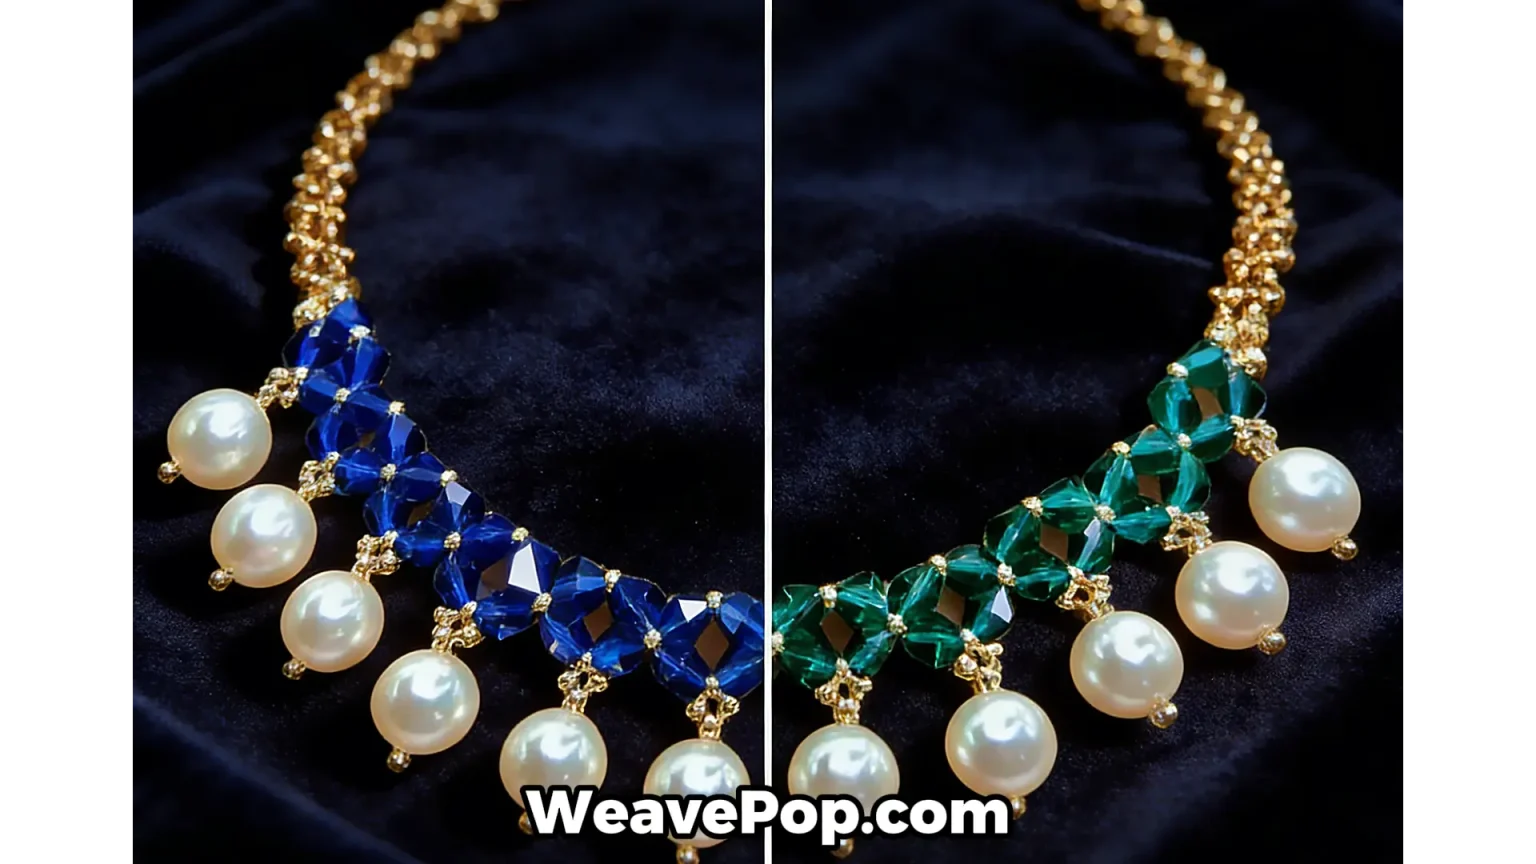
Get the Complete DIY Kit
Ready to make your own? We’ve bundled the exact materials into one complete necklace making kit. Every bead, every connector, and the full video tutorial – all in one box.
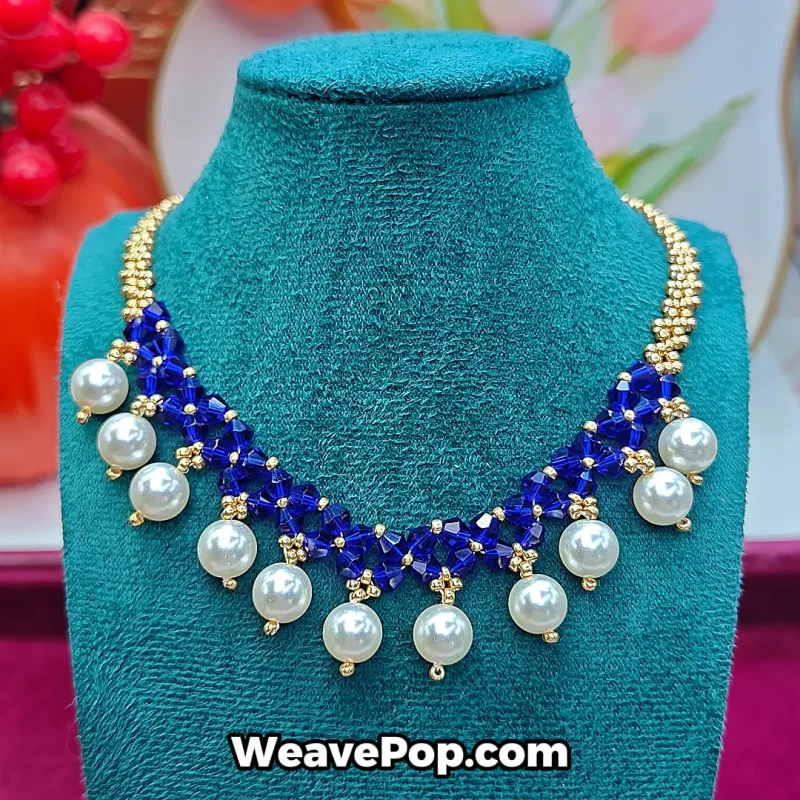
Crystal Pearl Necklace Making Kit – Vintage Drop Design | N005
Price range: $39.90 through $59.90Create a stunning crystal pearl necklace using a sophisticated beading pattern that feels elegant, vintage, and beautifully draped.
This necklace making kit is suitable for makers who enjoy intricate designs and want a rewarding beading experience.
✔ Vintage crystal drop design
✔ Available in Royal Blue & Emerald Green
✔ Video tutorial included
Select options This product has multiple variants. The options may be chosen on the product page


